Inspired by the amazing work of people who create games entirely in CSS, I decided to create a game in an ecosystem that I am well-versed in: javascript with react. I wanted to see how far I could go with the technology I was familiar with while also learning something new, so I decided to make my game available as a react component via the npm repository. As a result, anyone with a react project could potentially embed my game.
If you want to try out the game before continuing, you can do so here. (This may make reading this article easier)
Game design
The game design phase was very simple because I had already released a mobile game called Super Slide Me a few years before. I thought it would work well with HTML/CSS graphics.
It is a simple puzzle game that looks like this:
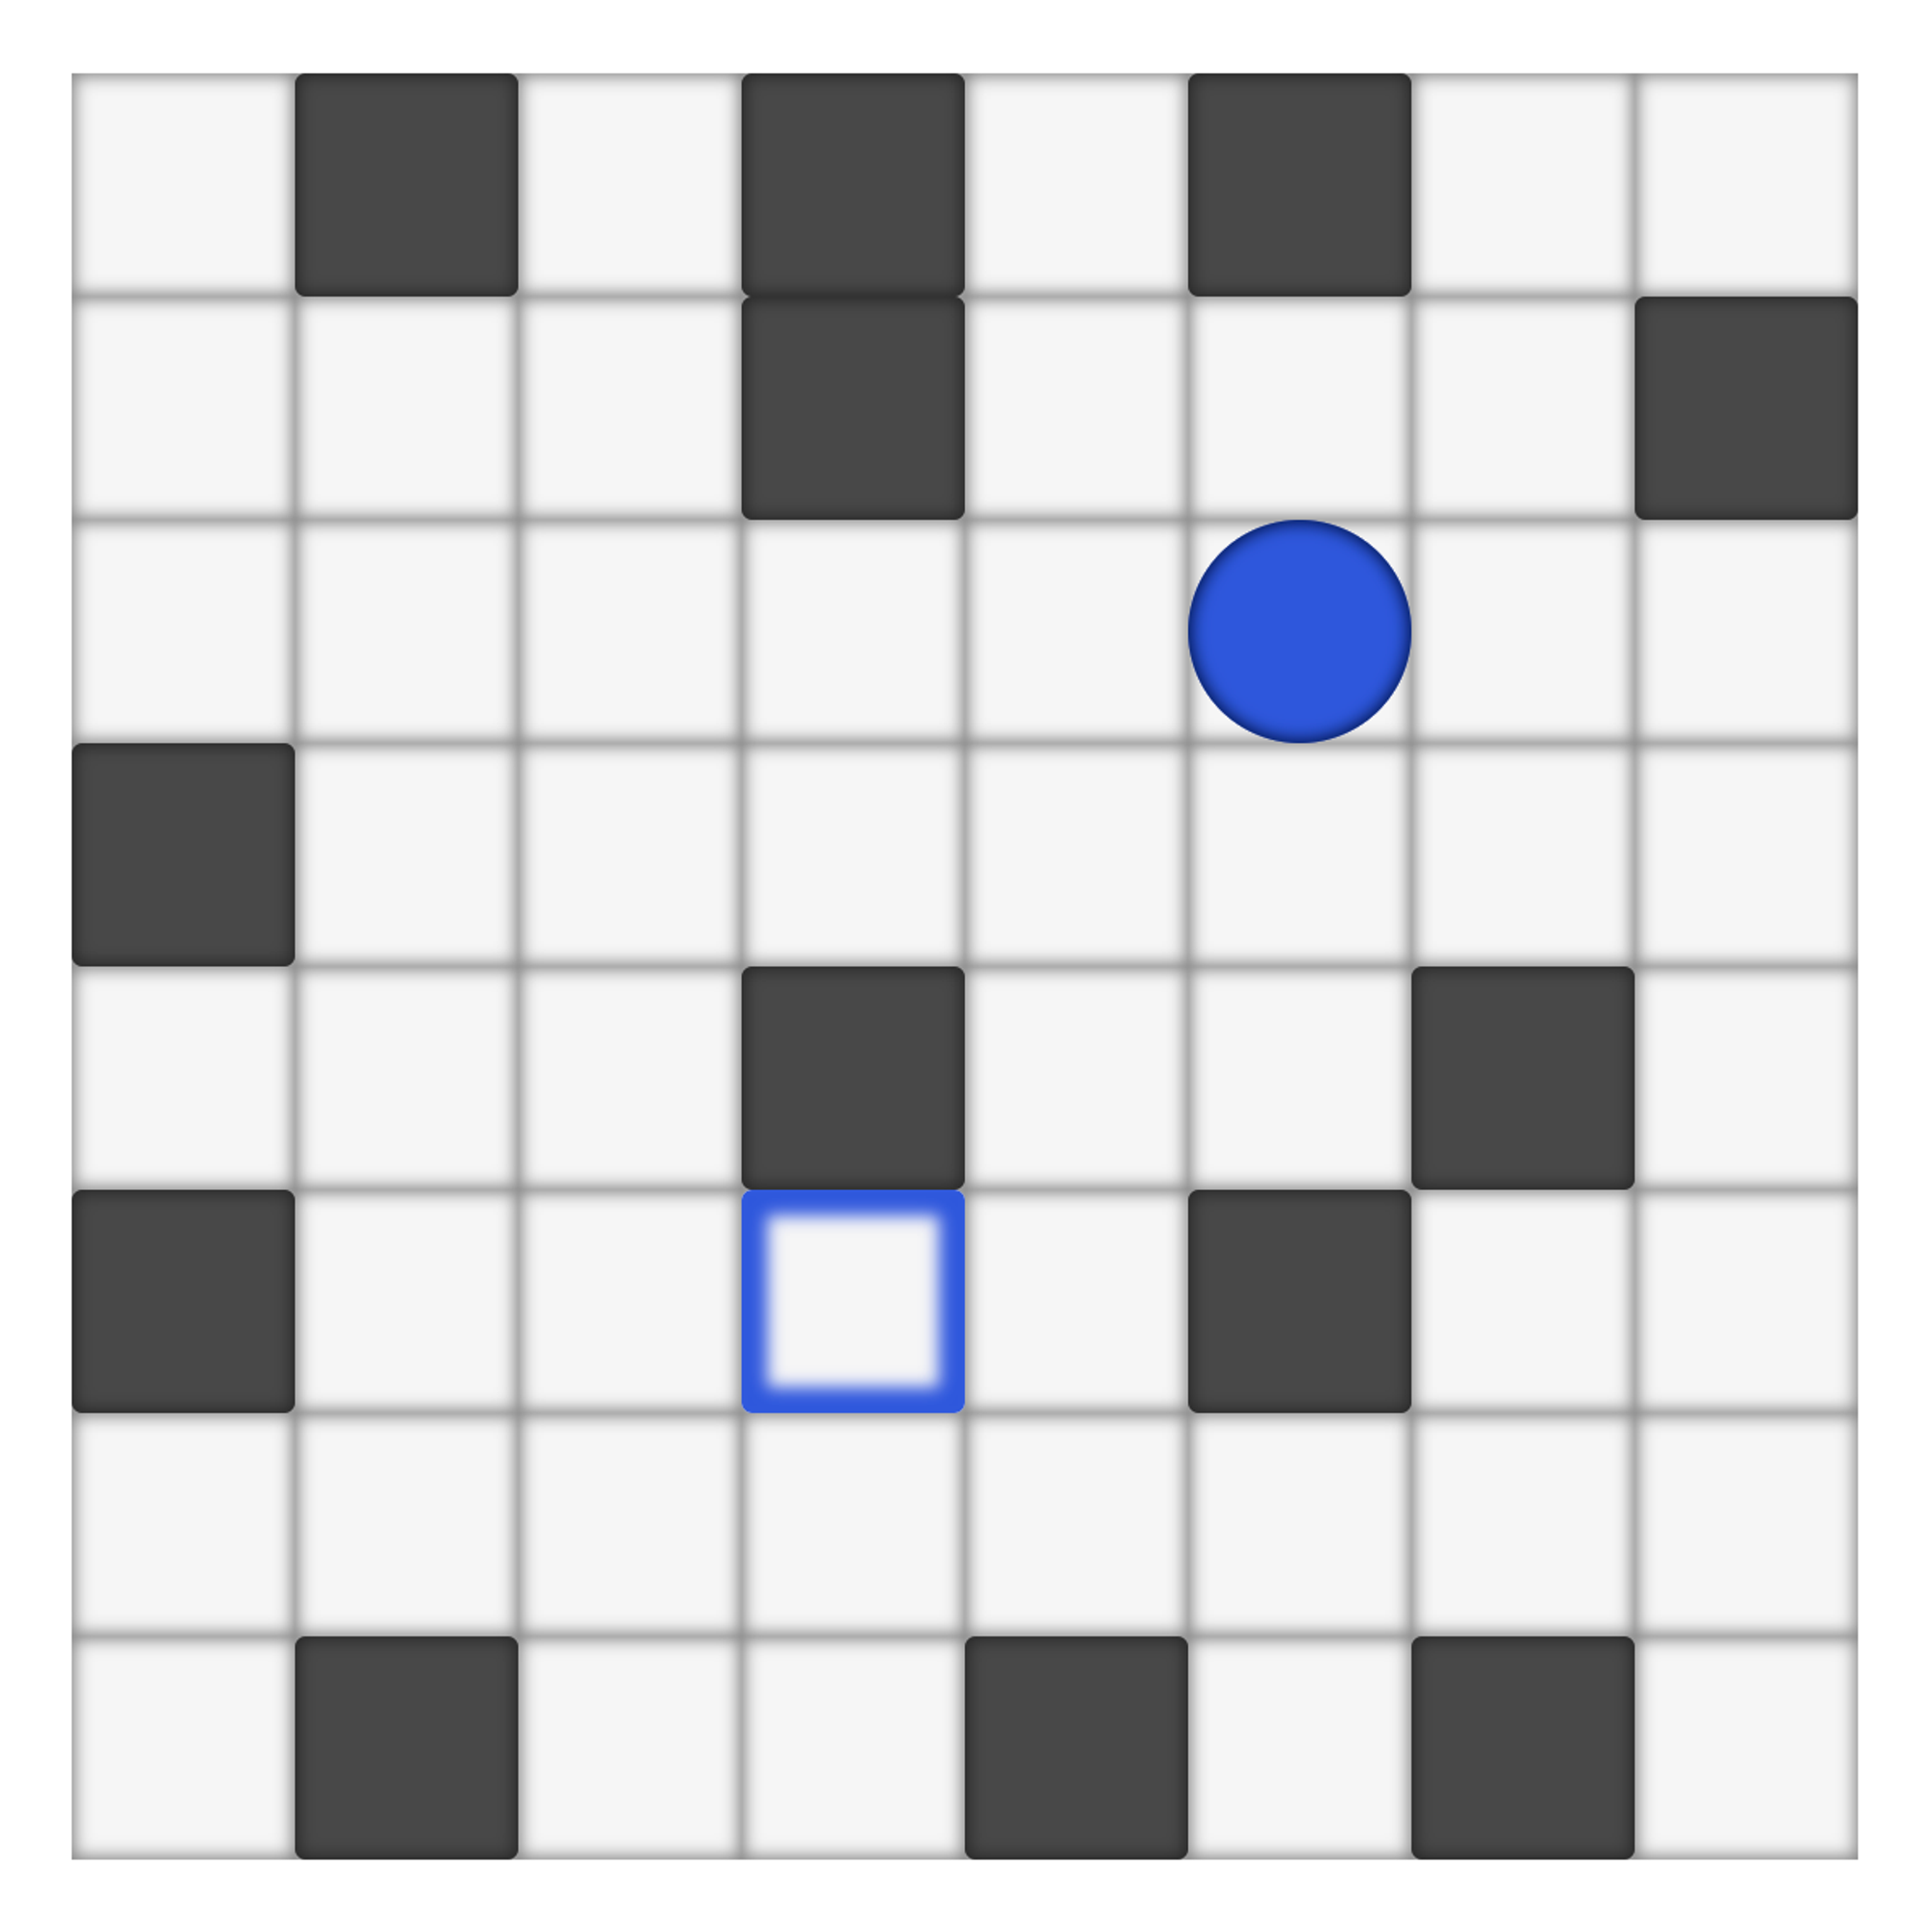
The goal is to get the ball into the same-colored square.
You can move in four cardinal directions, but each movement takes the ball as far as it can go - it only stops if it hits a solid wall.
In later levels, there are also special fields and multiple movable objects, with the gimmick that they all move at the same time. As a result, your single action moves all movable elements in the same direction (as in the popular 2048 game)
The Technical Stack
So, now that I knew what I wanted to build, I needed to select the appropriate tools.
First and foremost, I knew I would have to create some game objects and structures, so I decided to do so in Typescript. Without it, I would quickly lose track of all the different game objects' properties. Furthermore, having at least props typed would be beneficial for other typescript projects if I released it as a npm package.
I wanted to organize the code around the Model-View-Controller paradigm. I chose styled-components for the view part. The simple visuals can be created without the use of canvas by using HTML and CSS alone. I used Redux for the model and controller parts. Its store and actions are ideal for my requirements.
Graphics
The game's static graphics were simple to create. The game board is simply a styled div with the attribute position: relative; and the game tiles are rendered onto it in a loop. Because the game supports different puzzle sizes, the height and width of the tiles must be calculated based on the level presented.
The game then renders level elements based on their type and position.
The movement animation was the most difficult to perfect. The game calculates the final positions of all the elements after the move is made. When we have the starting and ending positions of all the elements, we can create the movement. The animation is done by the css transition attribute. One thing to keep in mind is that different elements may travel different distances during a single action, so we must calculate the animation time for each of them separately. This allows them to all move in unison.
State
I went with the most obvious option for game state management: Redux. I kept all of the level layouts as well as the active level state in its store.
The active level state is stored in the currentLevel object, which contains the level number, level size, and a list of level elements:
export interface CurrentLevel {
    number: number,
    elements: CurrentElement[],
    boardSize: number,
}
The element objects used in CurrentLevel follow this interface:
export type ElementType = "Start" | "End" | "Wall" | "Box" | "Void" | "GreenField" | "RedField" | "AltStart" | "AltEnd" | "BlueBox" | "BluePath" | "Crusher" | "OrangeWall";
type ElementState = "Triggered" | "Default" | "Void";

export interface Element {
    type: ElementType,
    posX: number;
    posY: number;
    state?: ElementState;
}

export interface CurrentElement extends Element {
    previousPosX: number;
    previousPosY: number;
    renderOrder: number;
}
The most important values are element position, type, and state. State value is important because some elements change their behavior when they interact with other elements.
Additional attributes are provided by the CurrentElement interface. They are necessary for proper rendering. Previous positions are required for movement animation calculations, and renderOrder determines which element should be rendered on top of the other. (Some elements may occupy the same space as others.)
With the game state organized in this manner, we can calculate each move made by the player.
Actions
There are four basic player moves that are implemented as redux actions:
moveLeft, moveRight, moveUp, and moveDown. When the player dispatches the action the whole movement logic is triggered in the reducer.
Reducer attempts to move each element one position in the chosen direction. It repeats this process until no element can move any further and the state is stable. This is a simplified version of the used algorithm:
const move = (elements: CurrentElement[], direction: Direction, boardSize: number) => {
  sortByDirection(elements, direction);
  let tryToMove = true;

    while (tryToMove) {
        tryToMove = false;
        elements.map(element => {
            if (elementMovable(element)) {
                const { attX, attY } = getAttemptedPos(element, direction)
                if (!outOfBounds(attX, attY, boardSize)) {
                    const elementsOnAttPos = findElementsOnAttPos(attX, attY, elements);
                    if (elementsAllowForMove(elementsOnAttPos){
                        tryToMove = true;
                        interact(element, elementsOnAttPos);
                        element.posX = attX;
                        element.posY = attY;
                    }
                }
            }
        })
    }
}
The sortByDirection function is important to note because it sorts all the elements so that the movable element is never blocked by another movable element that has not yet moved. For example, if a player moves to the right, we want to start by moving the farthest right elements first, so they do not block elements on their left.
Then we check each element:
- If it is movable at all (some elements aren't):
if (elementMovable(element)) - if the position to which it is attempting to move is not out of bounds:
if (!outOfBounds(attX, attY, boardSize)) - What elements, if any, occupy the position to which it is attempting to move?
const elementsOnAttPos = findElementsOnAttPos(attX, attY, elements); - How those elements interact with the moving element
if (elementsAllowForMove(elementsOnAttPos)
interact(element, elementsOnAttPos);
When no more elements can pass through the checks, we have a final state.
Level Configuration
While the currentLevelState branch of the store tracks player’s moves through a single level, the store must also handle overall game progression.
The unlockedLevel and endGameReached fields in the store keep track of the player's progression through the levels. The store also has a currentLevelNumber field to indicate which level should be displayed. All of those values are also saved to the local storage, which functions as a basic save system.
The levels data is stored as an array under the levels key. This data is loaded at the start of the game. There are currently 104 base levels designed by me. They are, however, highly customisable. You can add the levelConfig prop to the <SuperSlideMe /> element. In this configuration, you can choose whether to play all of the levels, only the easy ones (chosen subjectively by me), the hard ones, or the shortened version of the game. The complete list of options can be found on the games npm page.
You can also create your own levels by using the customLevels prop. Each level is represented by a string. Each character in that string represents a different element or tile in the final level. For example:
const level =
'x..x.bx' +
'.xbx.x.' +
'.......' +
'x..e...' +
's.g.g..' +
'x......' +
'.x.x.x.'
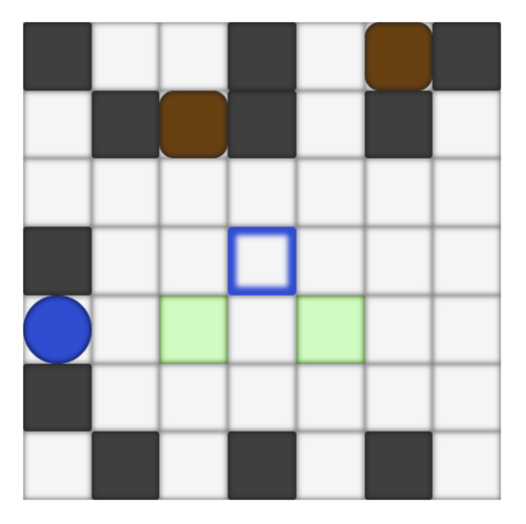
where "." denotes empty fields, "s" denotes the starting position of the blue ball, "e" denotes the ending tile, "b"s denote brown moving boxes, and "g"s denote green fields.
Again, the full description of all available options can be found on the npm page.
NPM
As previously stated, this game is available as a react component via the npm repository. It is possible to include it in any React project. Doing it this way presented some additional challenges.
I am using the Redux store in my project. It is stated in its documentation that using multiple stores is not recommended. So, what if someone decided to embed multiple games on one page, or if he already has his own redux store in place? Although the documentation states that having multiple stores is not recommended, it is still possible if you manage them properly.
So, in order for multiple games to work side by side as intended, we must provide unique ids for each game's store. As a result, the id is another optional prop for the <SuperSlideMe /> component. If it is not provided, it will generate based on the used configuration, so everything will function normally as long as the two games are not identical.
I also added the onLastLevelReached callback prop, which can be used to trigger an effect on your website based on the game's completion.
Typing was another issue that needed to be addressed. I needed to ensure that all of the appropriate types were exported from the SuperSlideMe.d.ts file. That way, typescript users will have an easier time configuring the game to their liking.
Conclusion
I deem my experiment to be successful. I began this project as a coding exercise, and I have learned a lot along the way. It turns out that writing simple games in React is not only possible, but also enjoyable if you use the right tools.
If you want to try out Super Slide Me, you can do so here or on my newly launched itch.io page.
If you want to embed it in your own site, please visit the npm page, and if you want to look through the code, visit github.

Check my Twitter

Check my Linkedin