
Teaching a Browser to Tell Cats From Dogs

So here's a fun Sunday project: I trained a tiny neural network to distinguish cats from dogs, compiled it to WebAssembly, and pointed my laptop camera at a picture of a cat on my phone. It worked, which is more than I can say for most of my Sunday projects. And the whole pipeline runs entirely in the browser - no server, no API calls, no "your image has been saved to seven analytics providers" footer.
You can try the trained model right here, in this very page:
Below is how to build the same thing yourself.
The ingredients
- Edge Impulse - the friendly ML platform that does the hard parts for us
- Kaggle's Dogs vs. Cats dataset - 25,000 photos of good boys and judgy girls
- YOLOv5 - doing free labor to draw bounding boxes for us
- MobileNetV2 SSD FPN-Lite - a mouthful of a model name that detects objects and is small enough to run in a browser
- WebAssembly (SIMD) - what makes all this fast enough to not melt your CPU
- Your device camera - the live input for the finished demo
Step 0: Get the data
Grab the Dogs vs Cats dataset from Kaggle. It's a classic - 25k images of cats and dogs, most of which are adorable, a few of which are cursed. You'll need a free Kaggle account and you'll have to accept the competition rules, but that's the extent of the bureaucracy - nobody asks you to describe your research intent in 500 words.
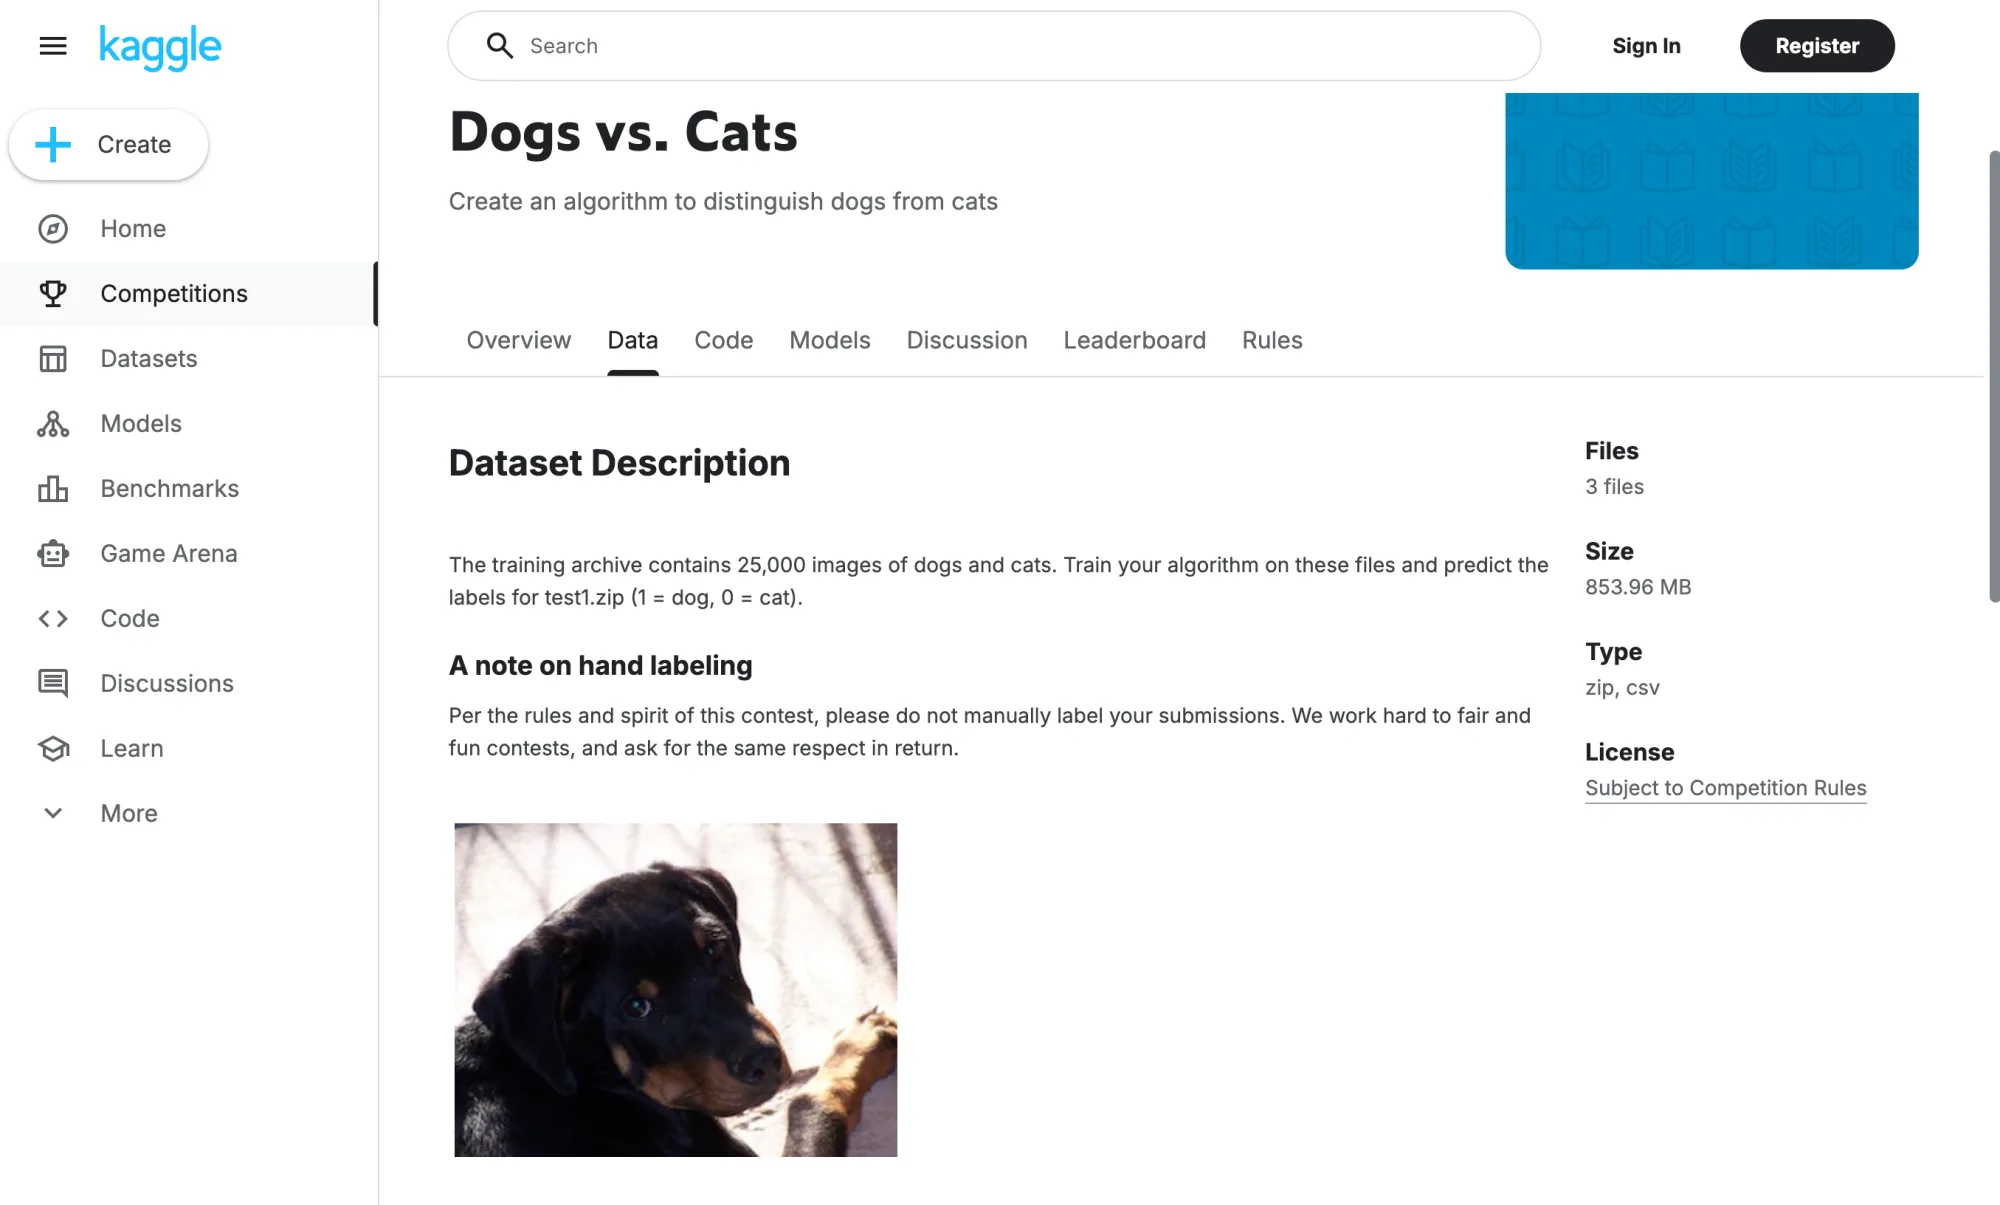
The competition page has a Data tab where you can download the archive. It's about 854 MB and contains three files; the one we care about is train.zip - 25,000 labeled images of cats and dogs.
Unzip it somewhere handy. We'll upload a subset to Edge Impulse in a couple of steps. You don't need all 25,000 - a few hundred per class is enough for a toy detector, and honestly your labeling sanity will thank you.
Step 1: Create a project
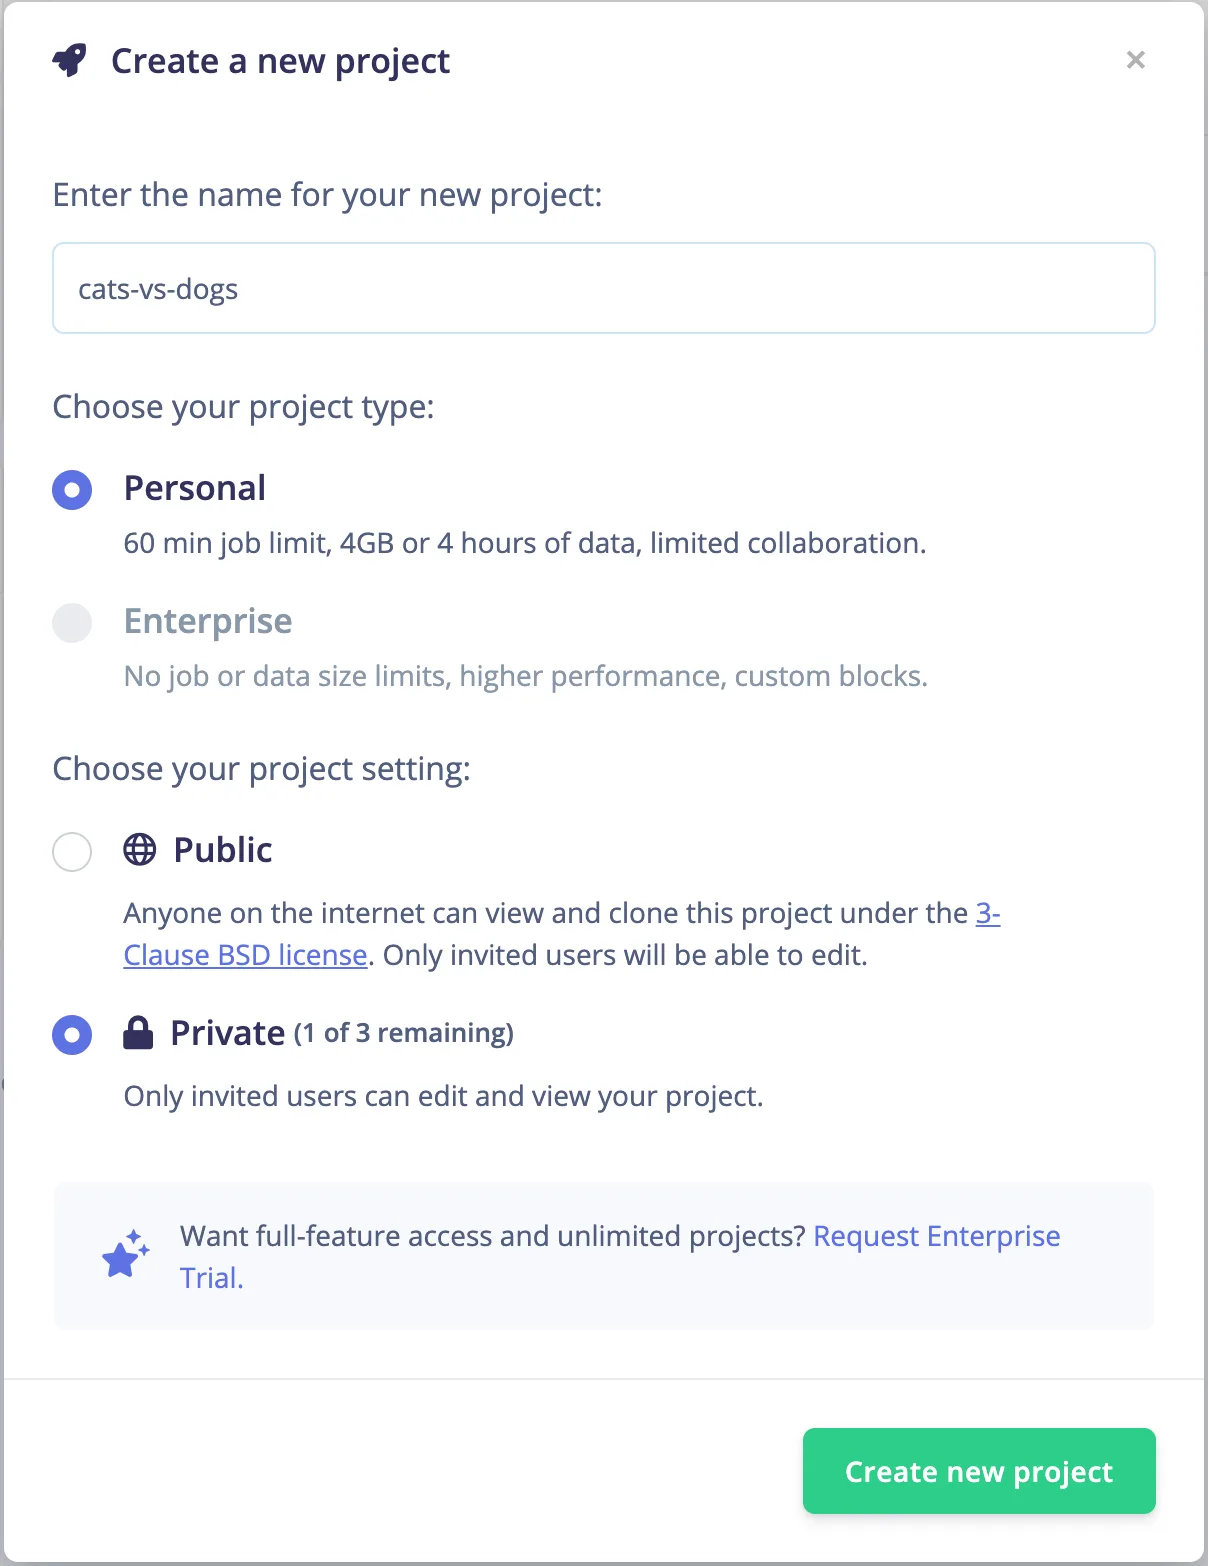
Head to Edge Impulse and spin up a new project. Give it a name that your future self will understand - I went with the wildly imaginative cats-vs-dogs. Pick Personal (free tier is plenty for this) and Private unless you want the whole internet to clone your cat detector.
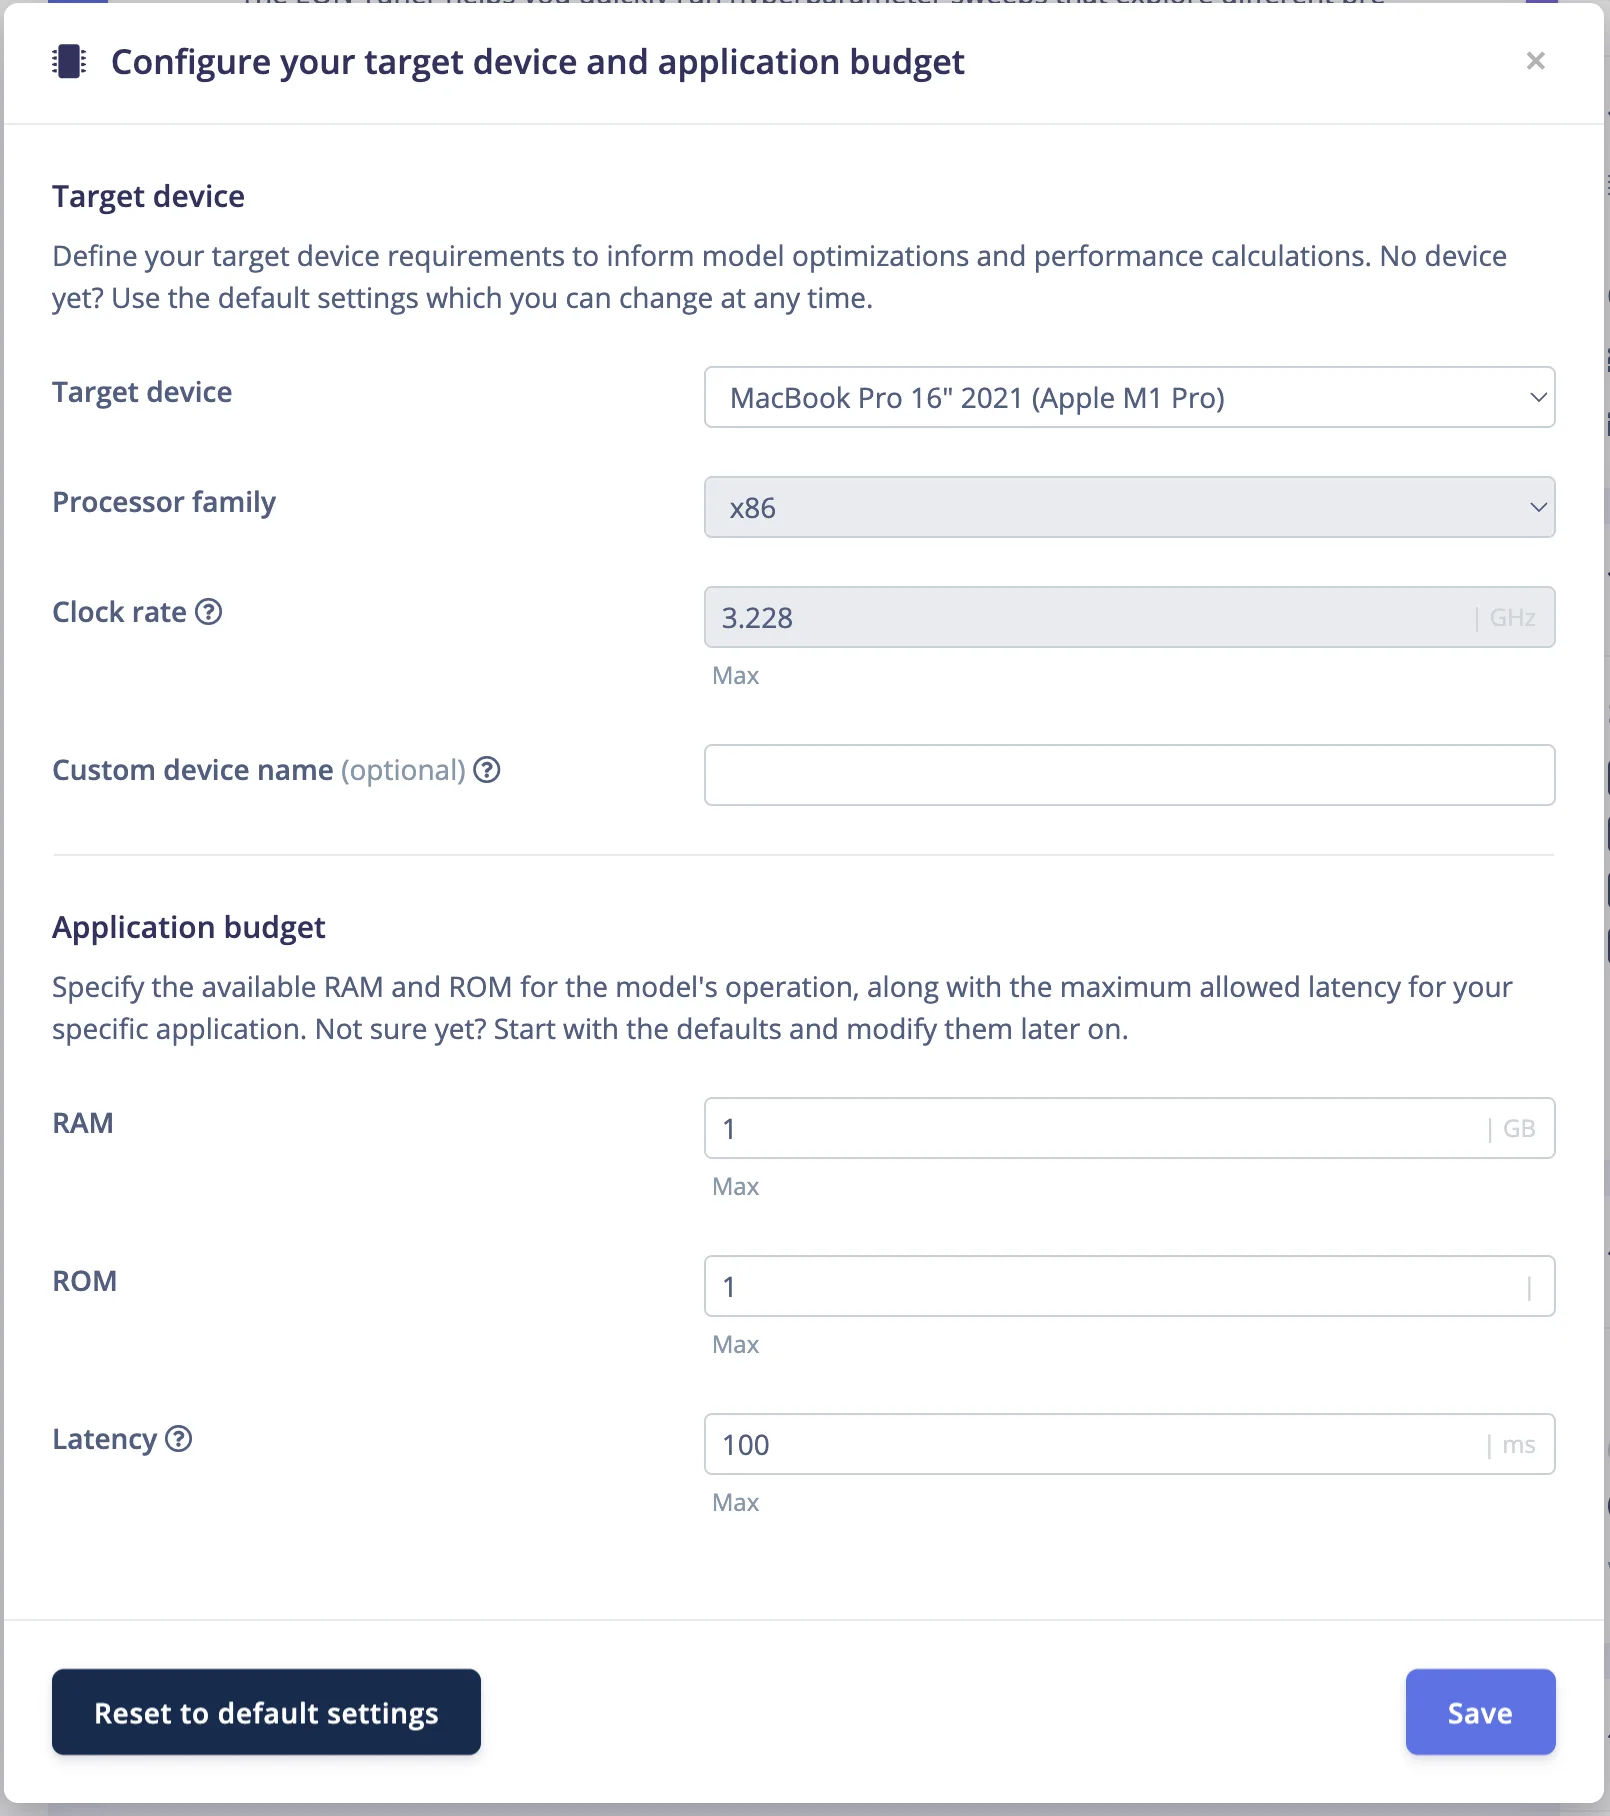
Next, Edge Impulse asks about your target device. This affects things like performance estimates and model optimization hints. Since we're deploying to a browser - which means running on whatever laptop or desktop the user happens to be on - x86 is the only processor family that really makes sense here. The specific device label Edge Impulse shows (MacBook Pro, in my case) isn't important; what matters is that we're targeting a general-purpose CPU, not a microcontroller with 256 KB of RAM.
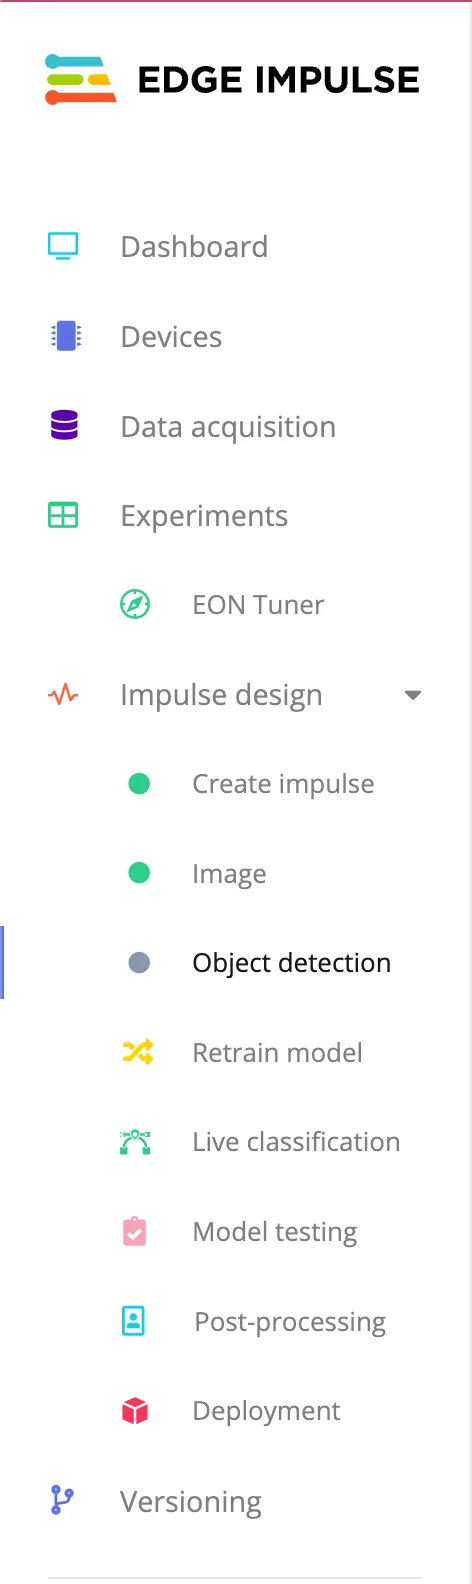
Once the project exists, you get a sidebar full of goodies. The ones we care about today: Data acquisition (dump our images here), Impulse design (wire up the pipeline), Object detection (the learning block), and Deployment (the whole reason we're here).
Step 2: Tell it we're doing object detection
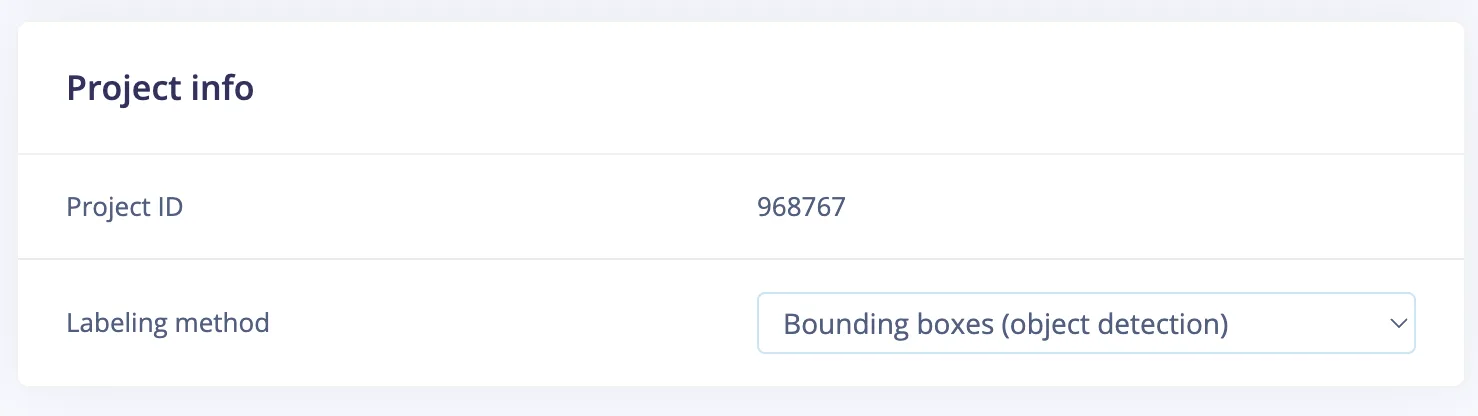
Before we upload anything, head to Dashboard → Project info and set the Labeling method to Bounding boxes (object detection). This is the difference between "is there a cat in this image?" and "here is exactly where the cat is in this image." We want the second one.
Step 3: Upload the data
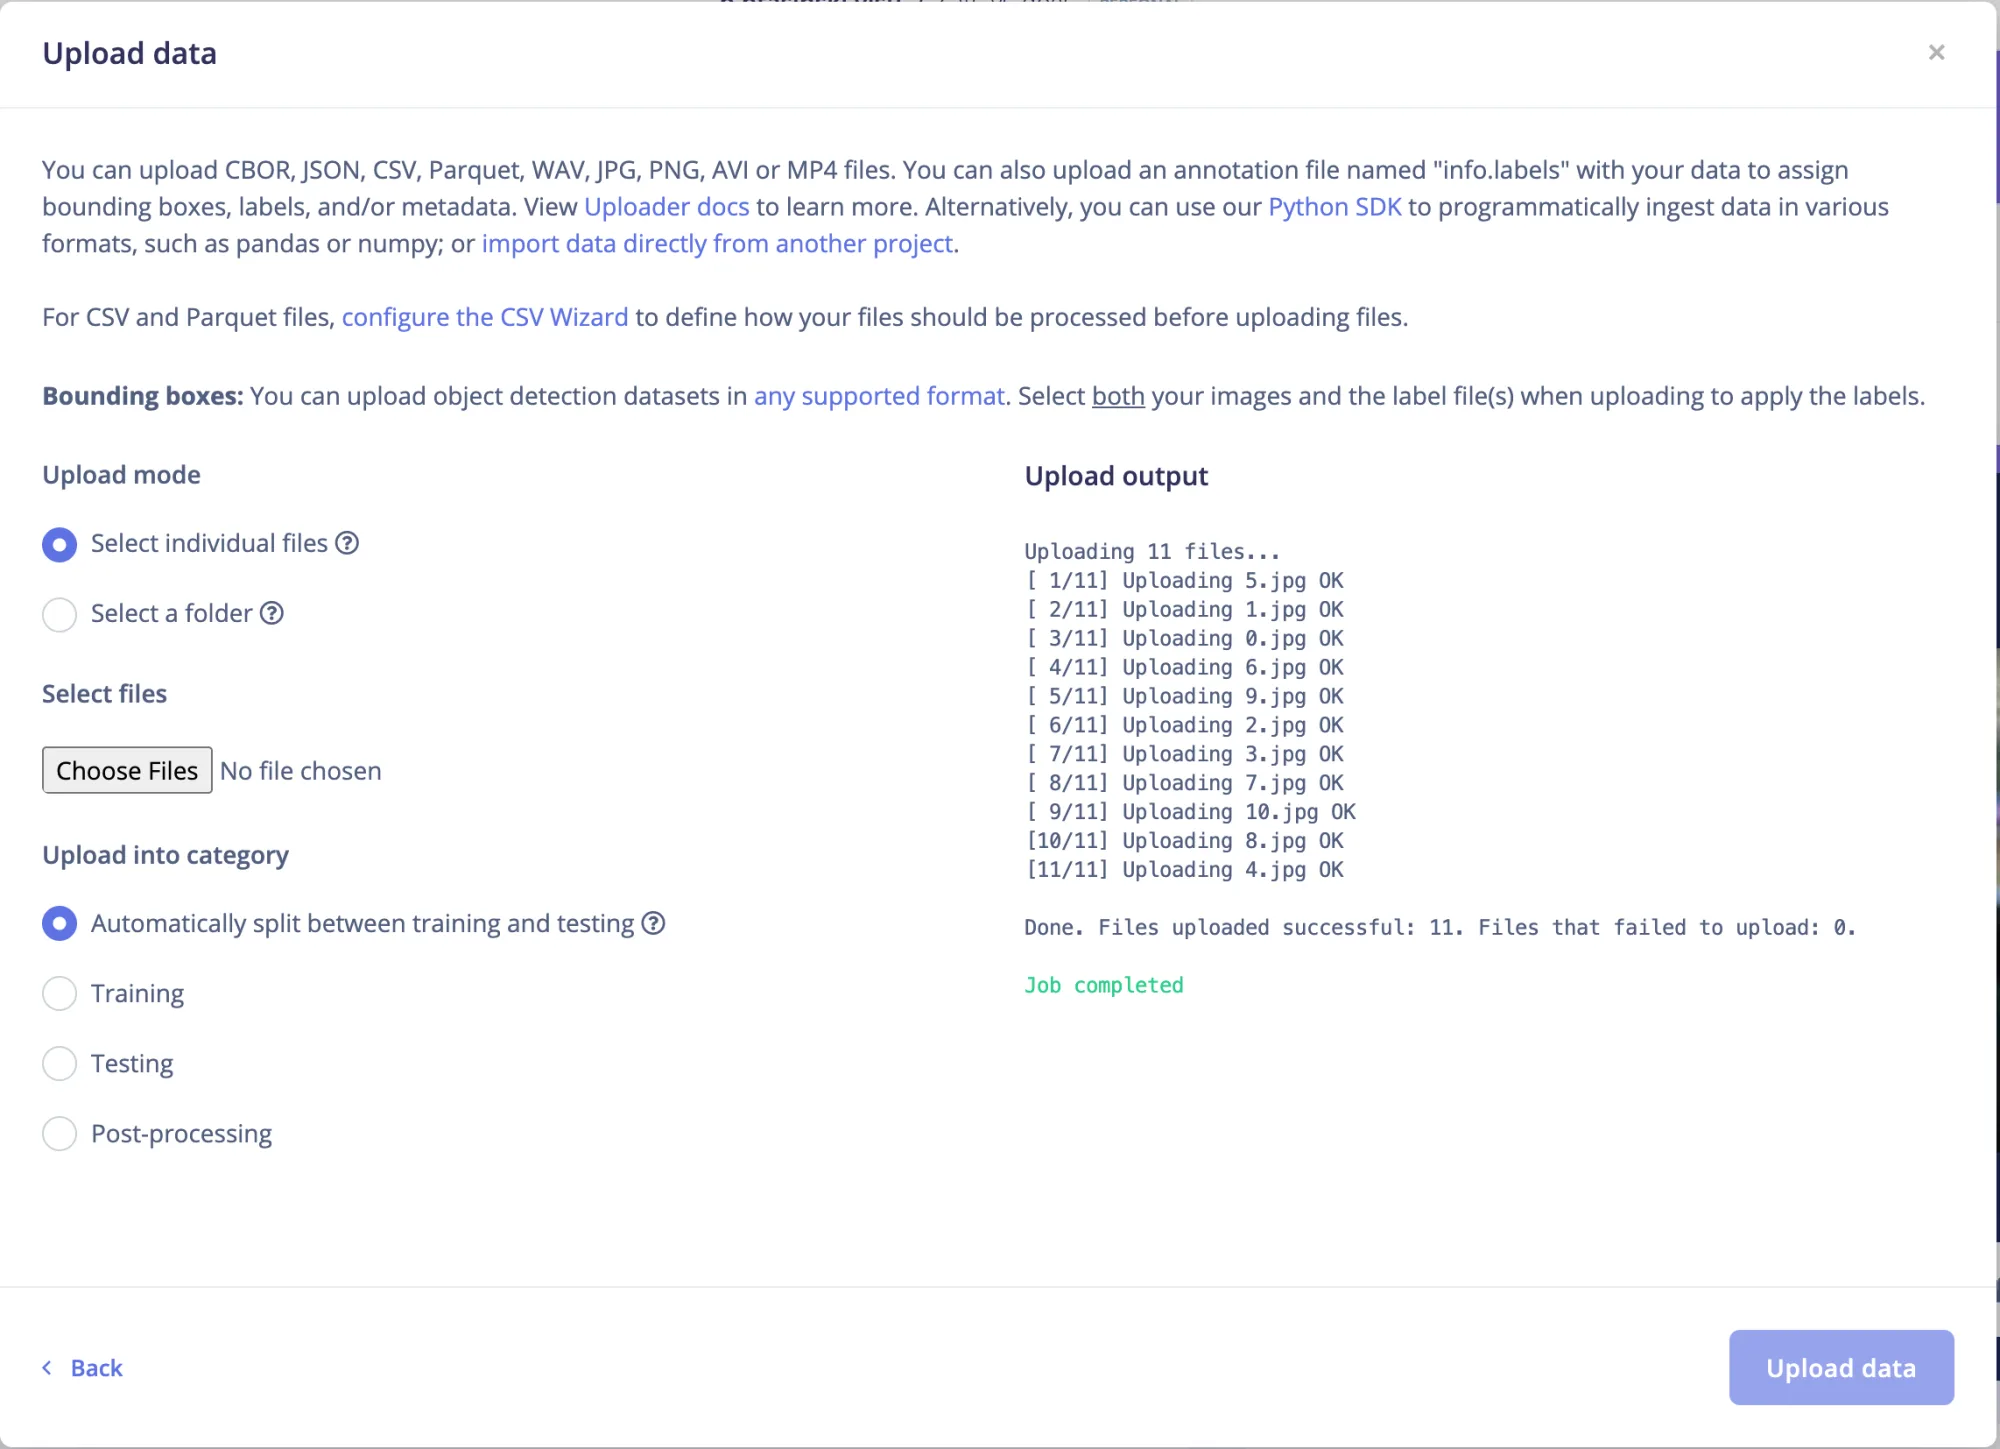
Back in Edge Impulse, go to Data acquisition and hit Upload data. Point it at your unzipped images and let Edge Impulse do the automatic train/test split. It'll show you a little progress log as it ingests everything. I only uploaded a small batch for this demo (Edge Impulse will happily digest thousands, but my patience is finite).
Step 4: Let YOLO do the boring part
Drawing bounding boxes by hand is how you develop RSI and resentment. Instead, in the Labeling queue, change Label suggestions to Classify using YOLOv5. Now every time you open a new image, YOLO has already drawn a box and guessed the label - you just confirm it and smash Save labels to advance.
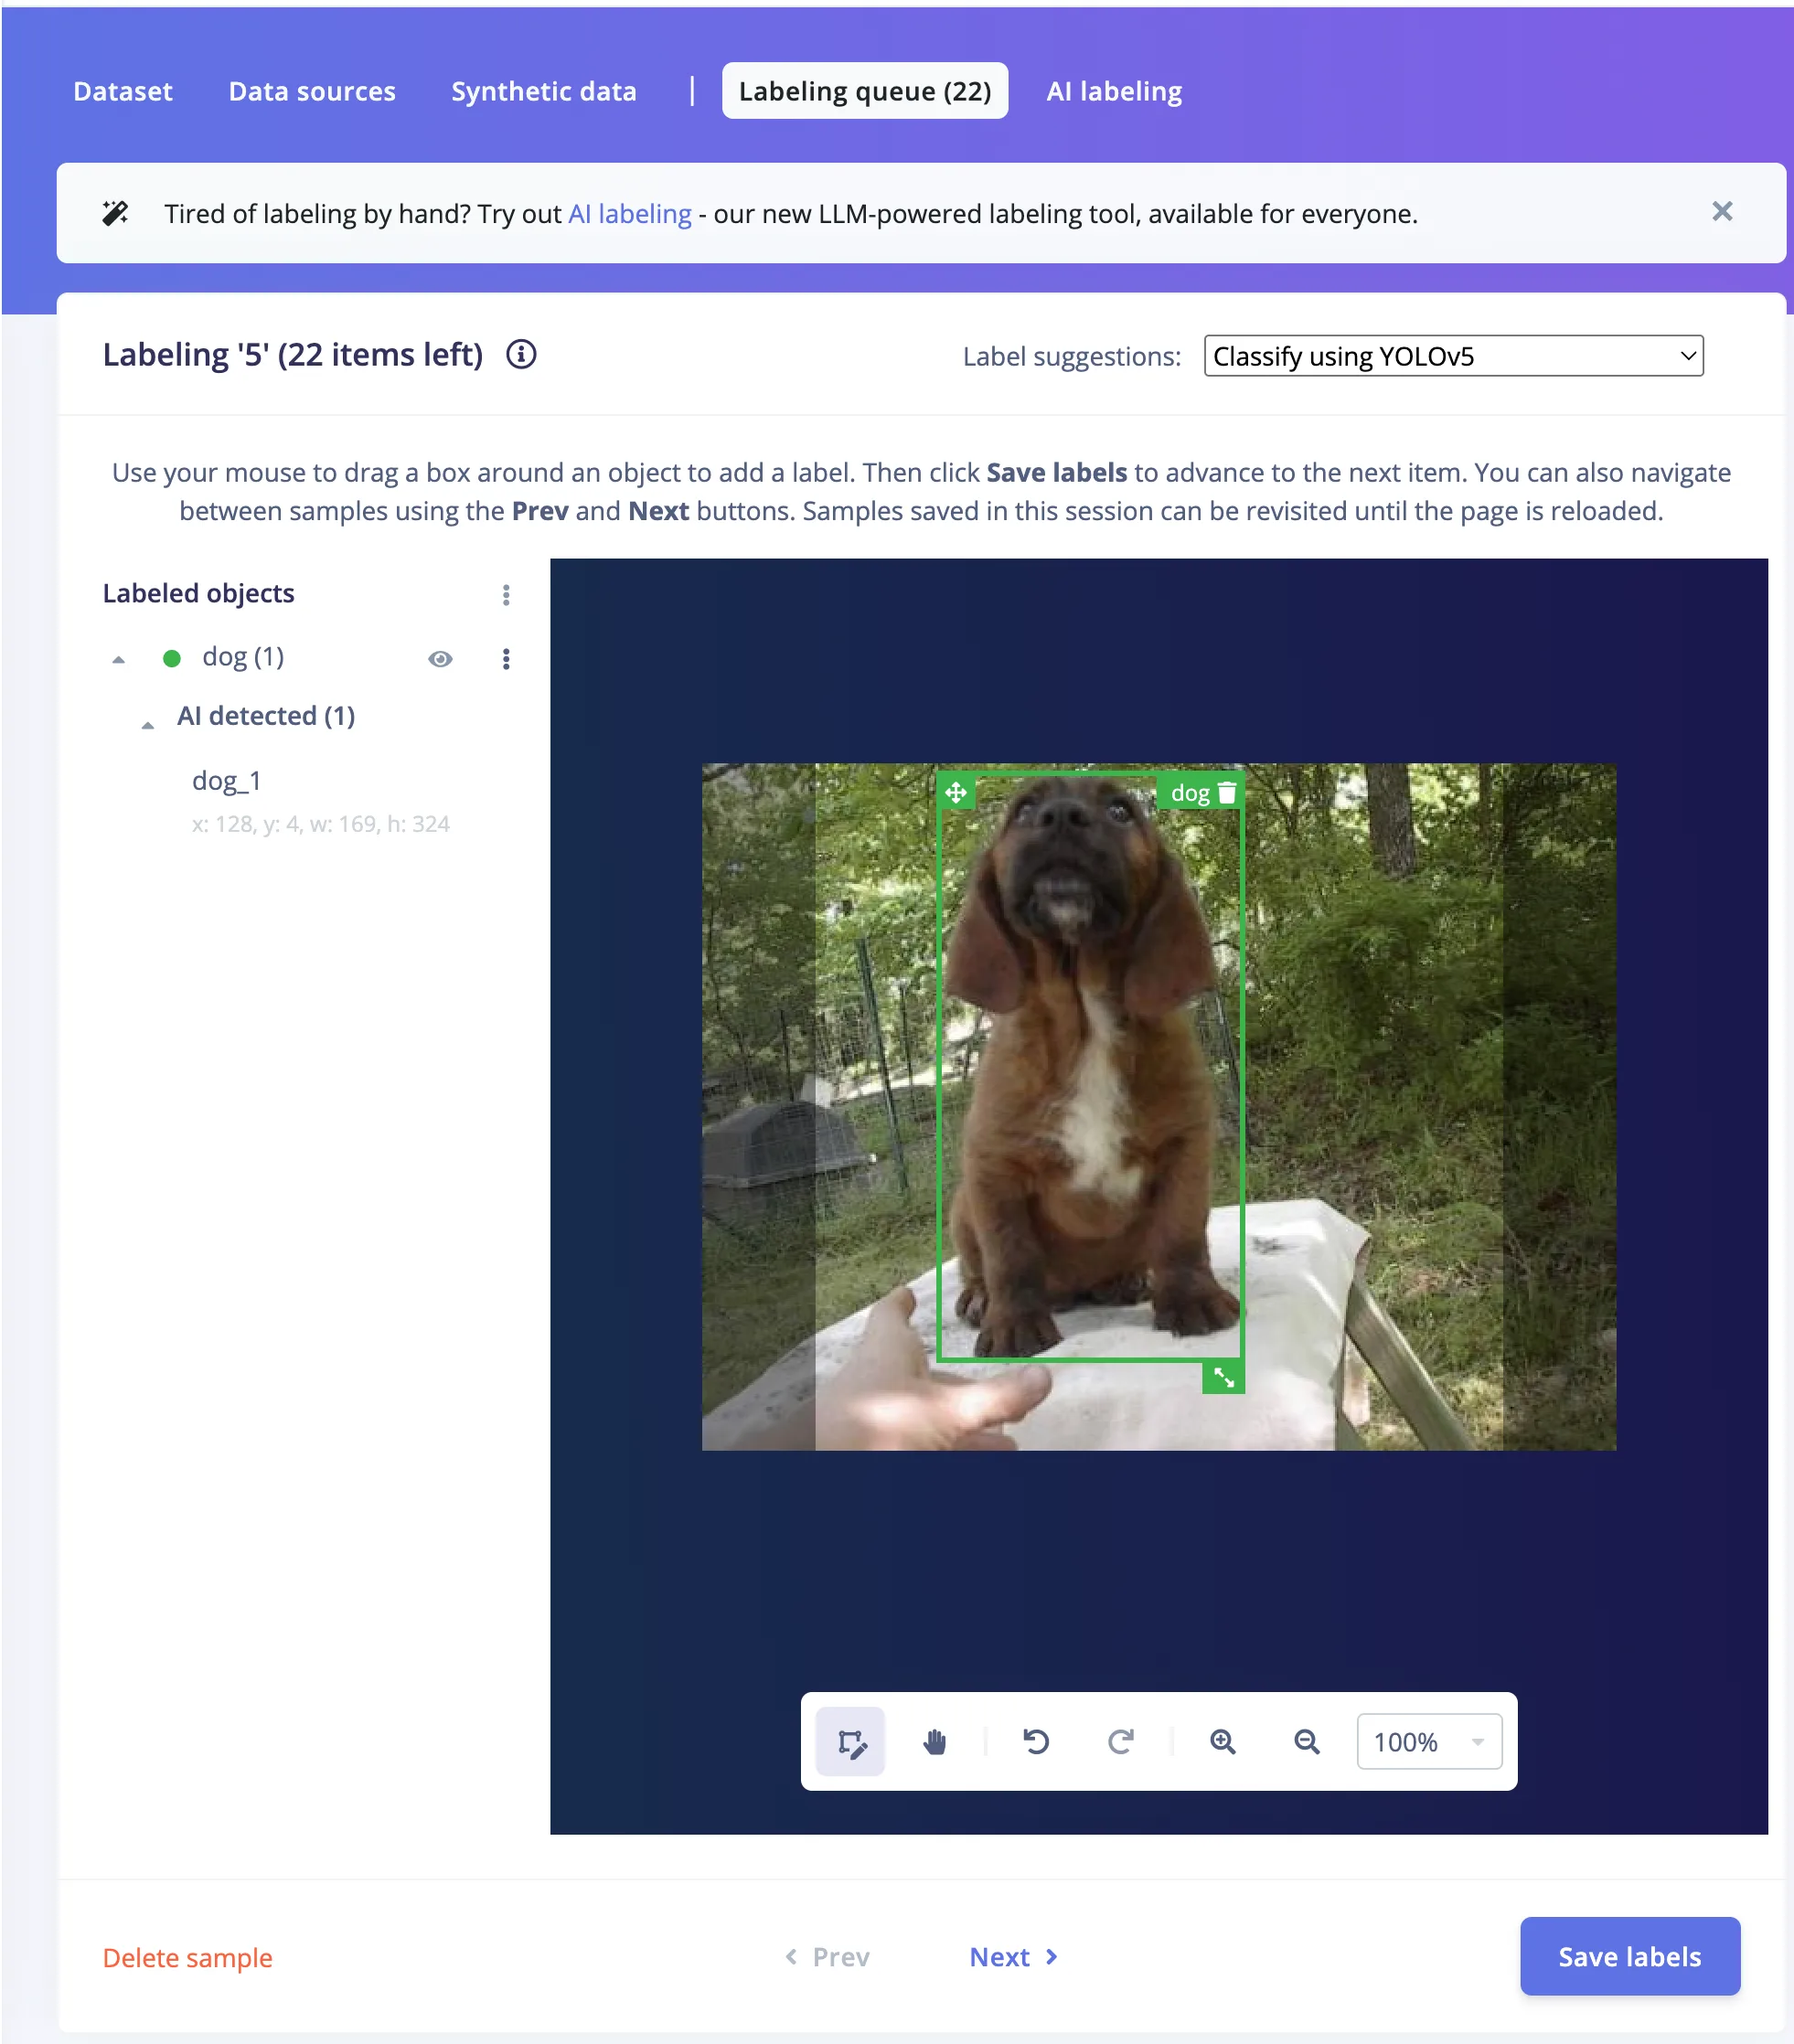
Yes, it's kind of surreal using a neural network to label images so you can train... another neural network. Welcome to 2026.
Step 5: Design the impulse
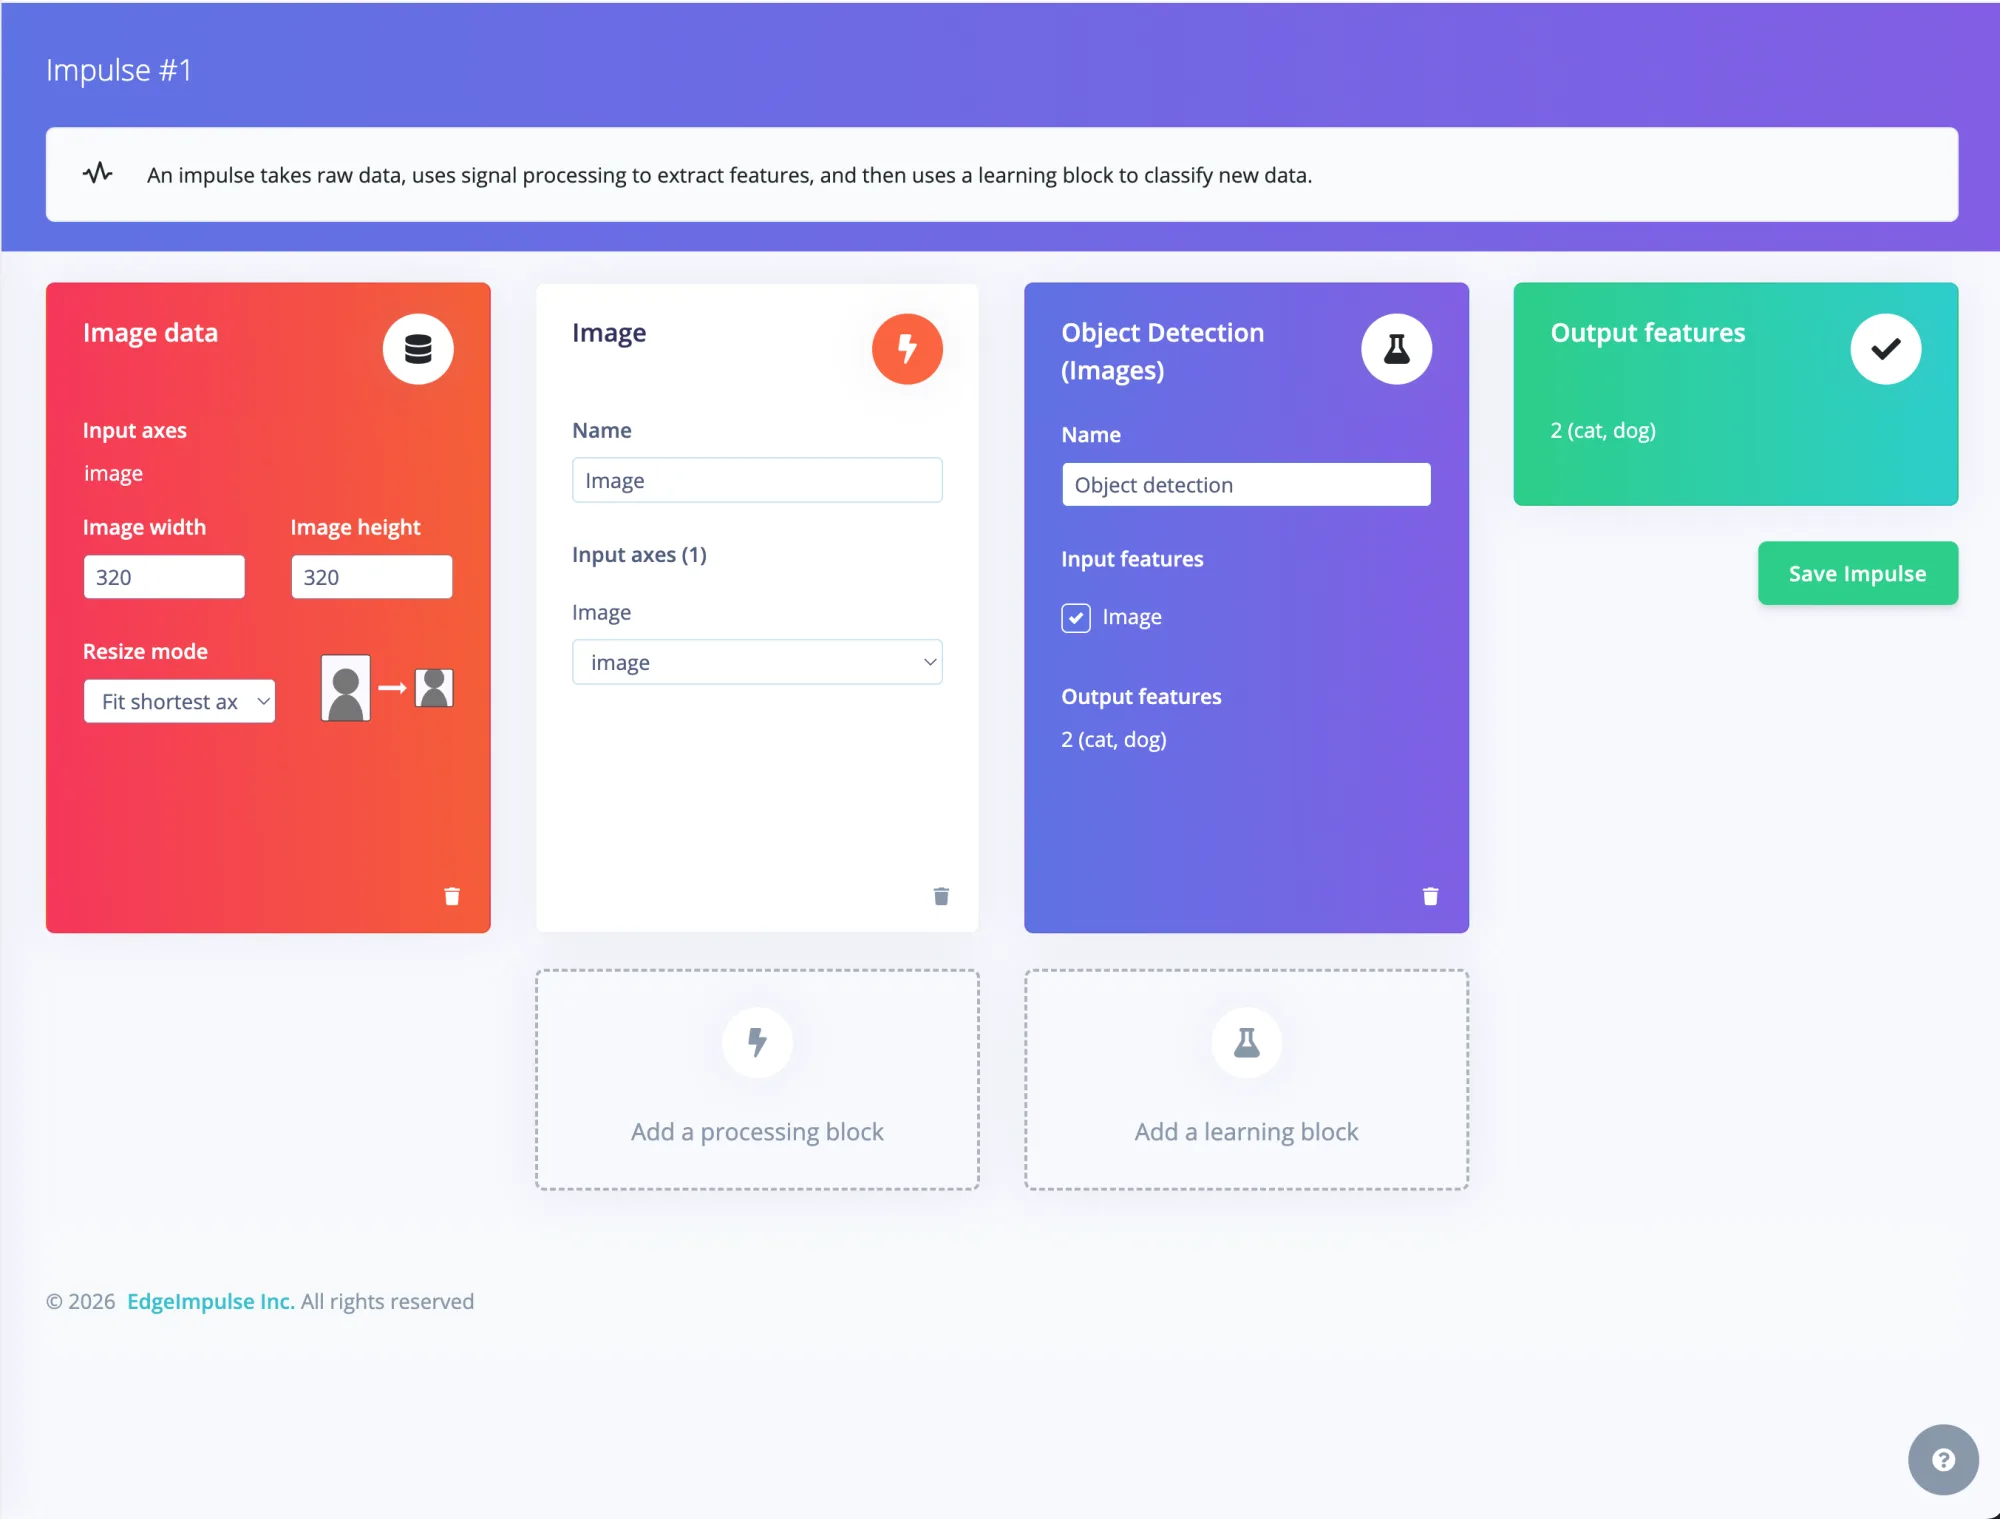
An "impulse" in Edge Impulse is the pipeline: input → processing → learning block. Click Impulse design → Create impulse and set it up like this:
- Image data: 320 × 320, resize mode "Fit shortest axis" (or "Squash" - both work)
- Processing block: Image (RGB)
- Learning block: Object Detection, outputting 2 classes (
cat,dog)
You should end up with four connected blocks flowing left to right: raw image data → image processing → object detection → output features. Hit Save Impulse.
Step 6: Save parameters and generate features
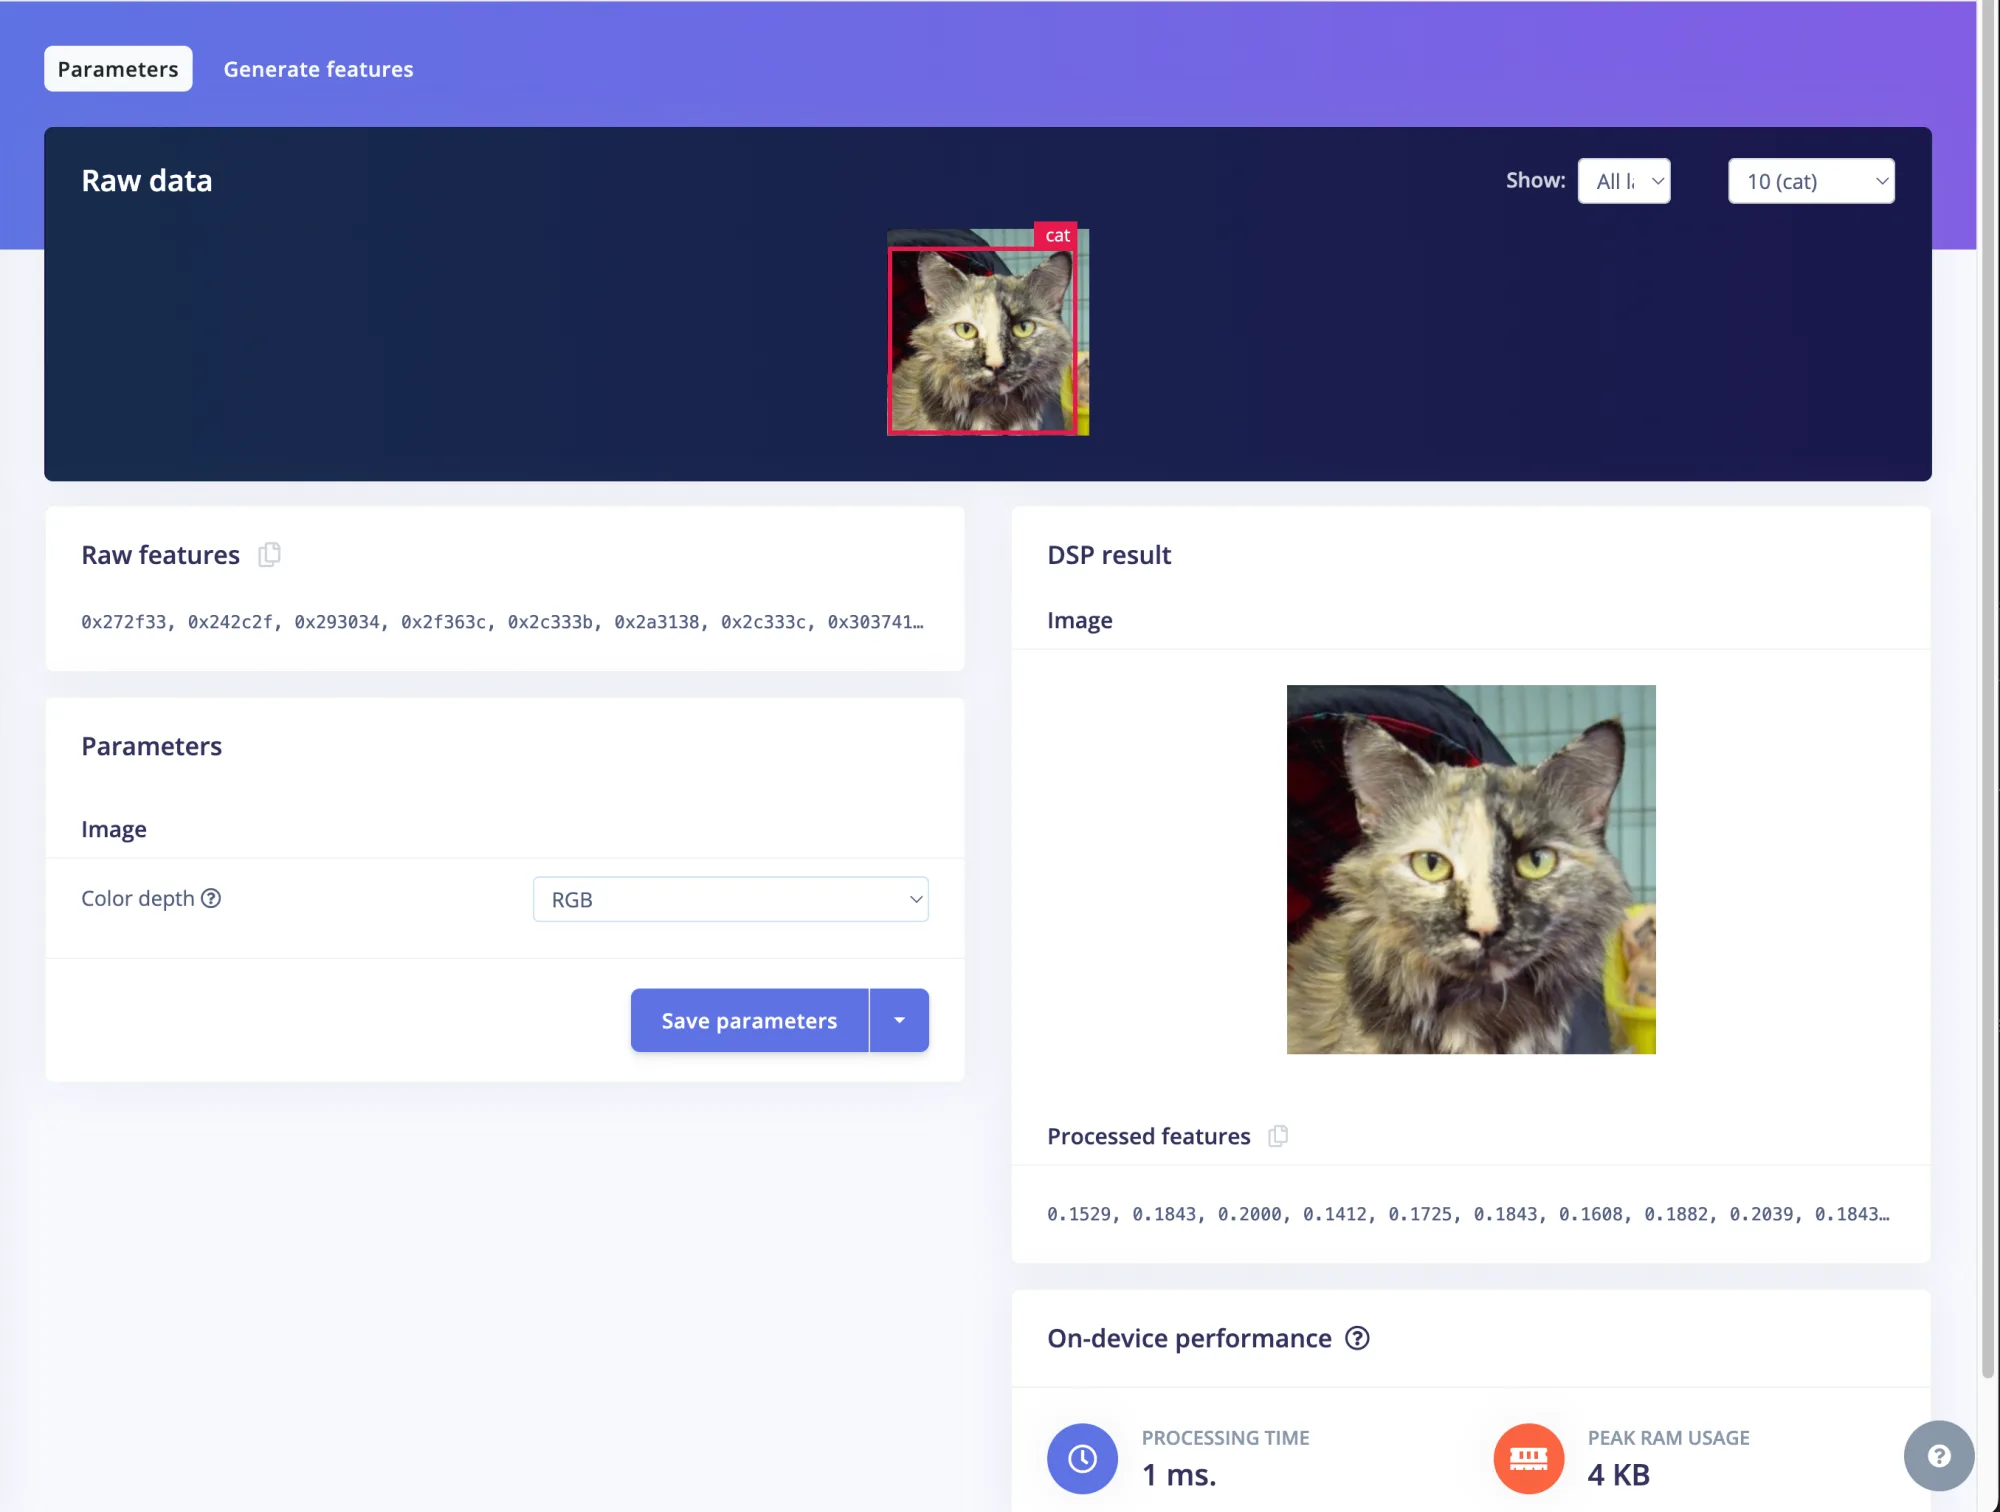
Now we click into the Image block (middle panel). The Parameters tab lets us confirm the color depth (RGB - we want all three channels) and preview how a sample image looks after preprocessing. You'll see the raw pixel features on the left and the normalized "DSP result" on the right. Hit Save parameters.
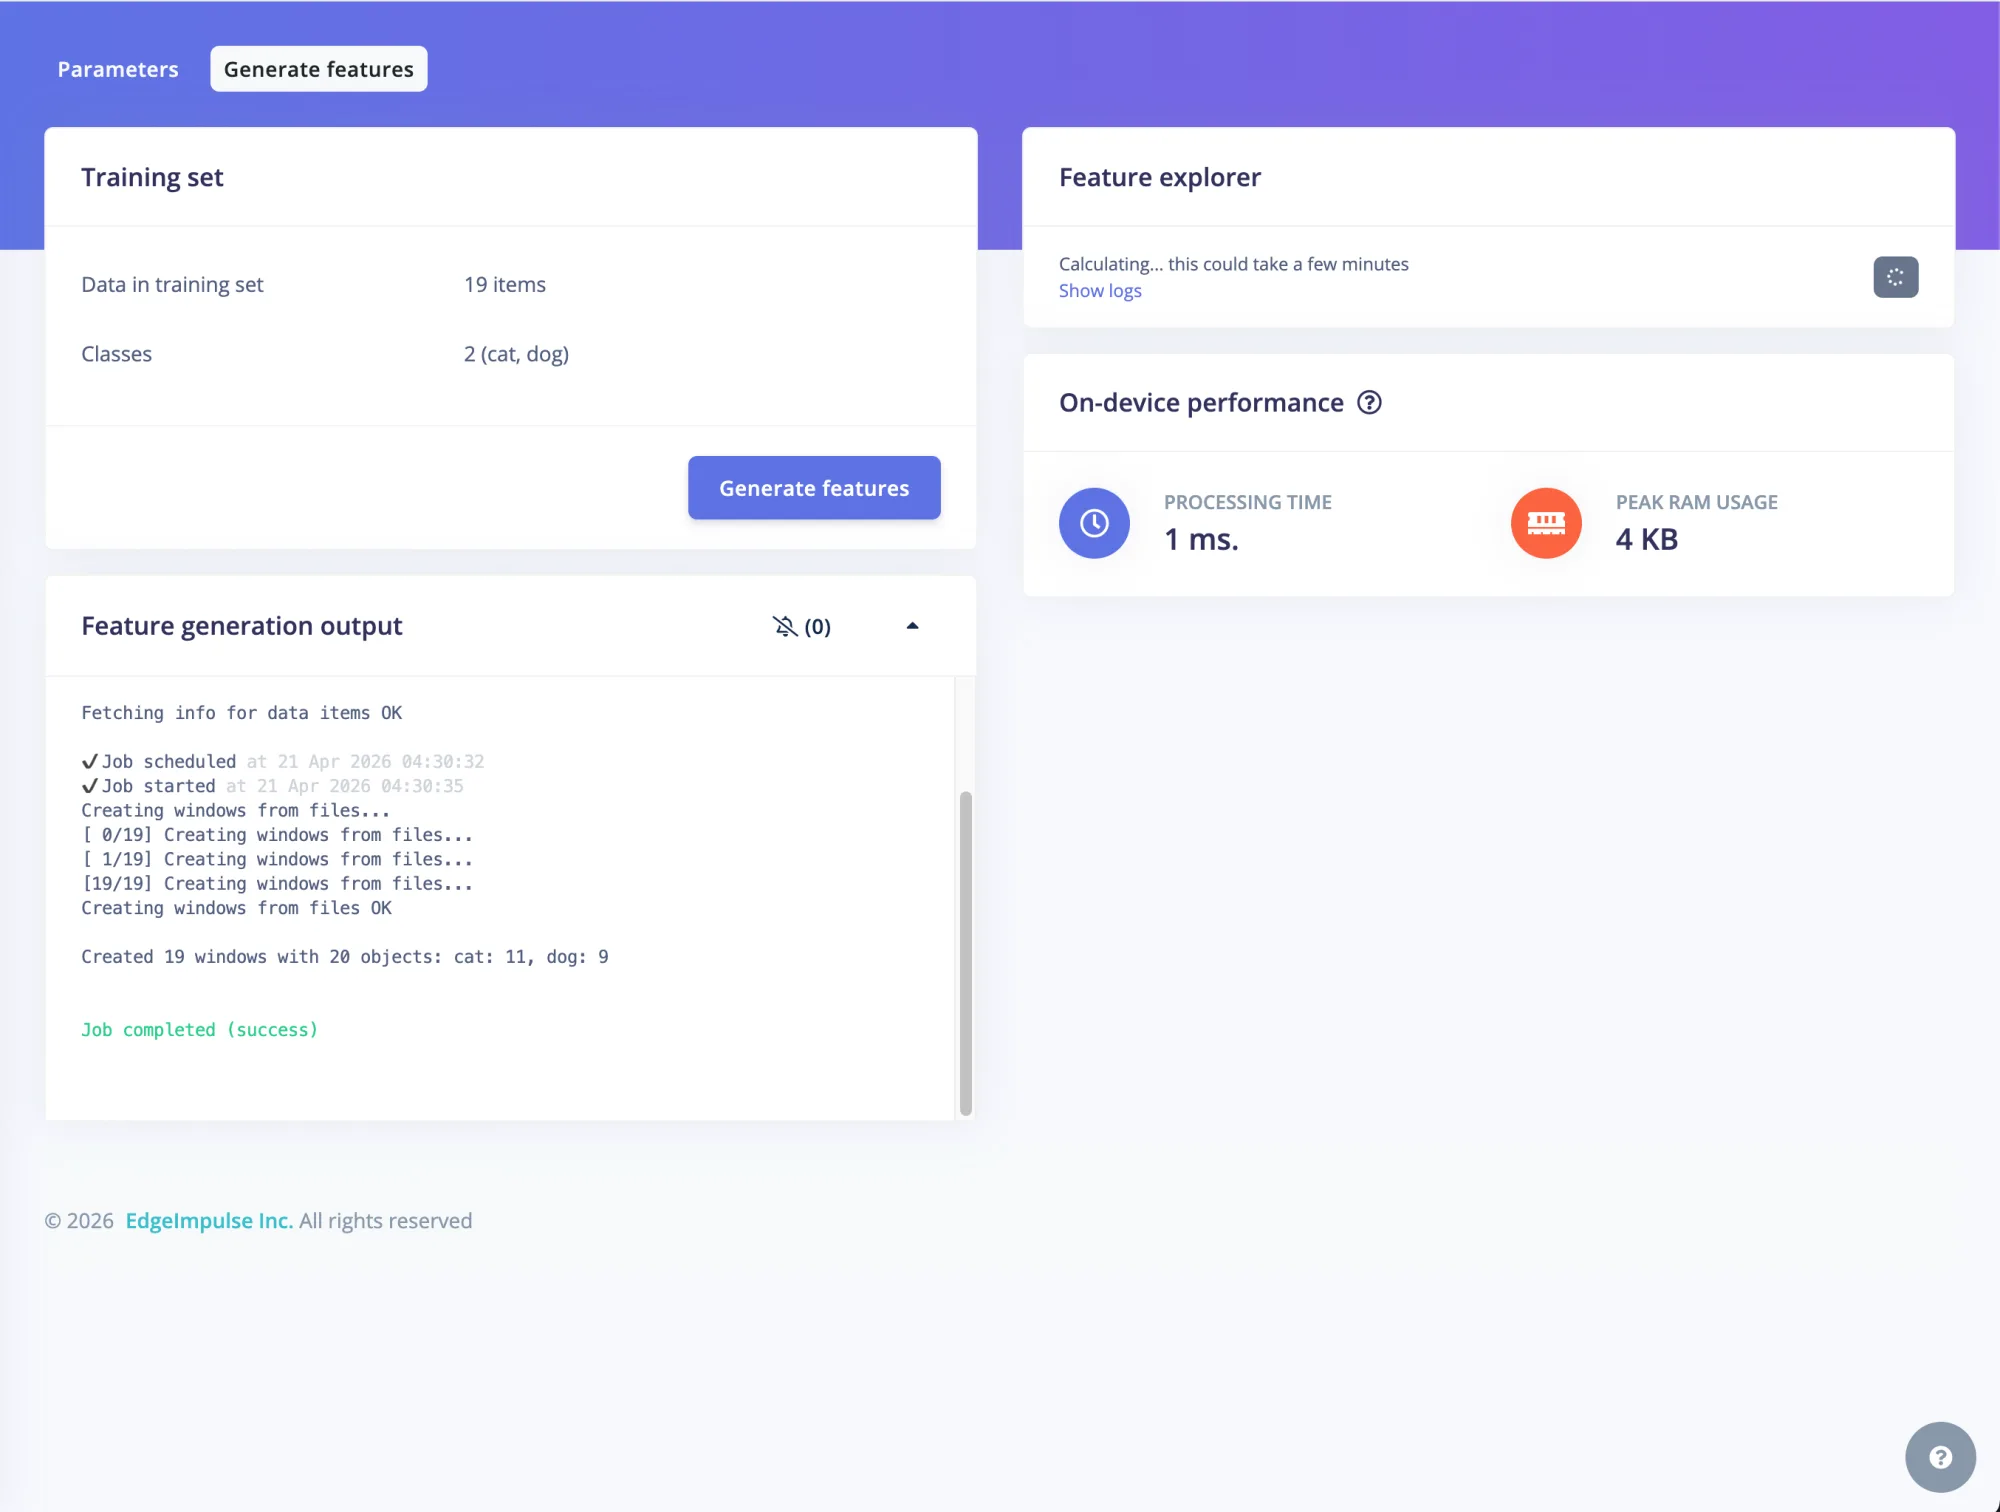
Then click over to Generate features and smash the big blue button. Edge Impulse chews through every image in the training set, packs them into the format the learning block expects, and prints a happy green "Job completed (success)" when it's done. Go make coffee.
Step 7: Pick a model
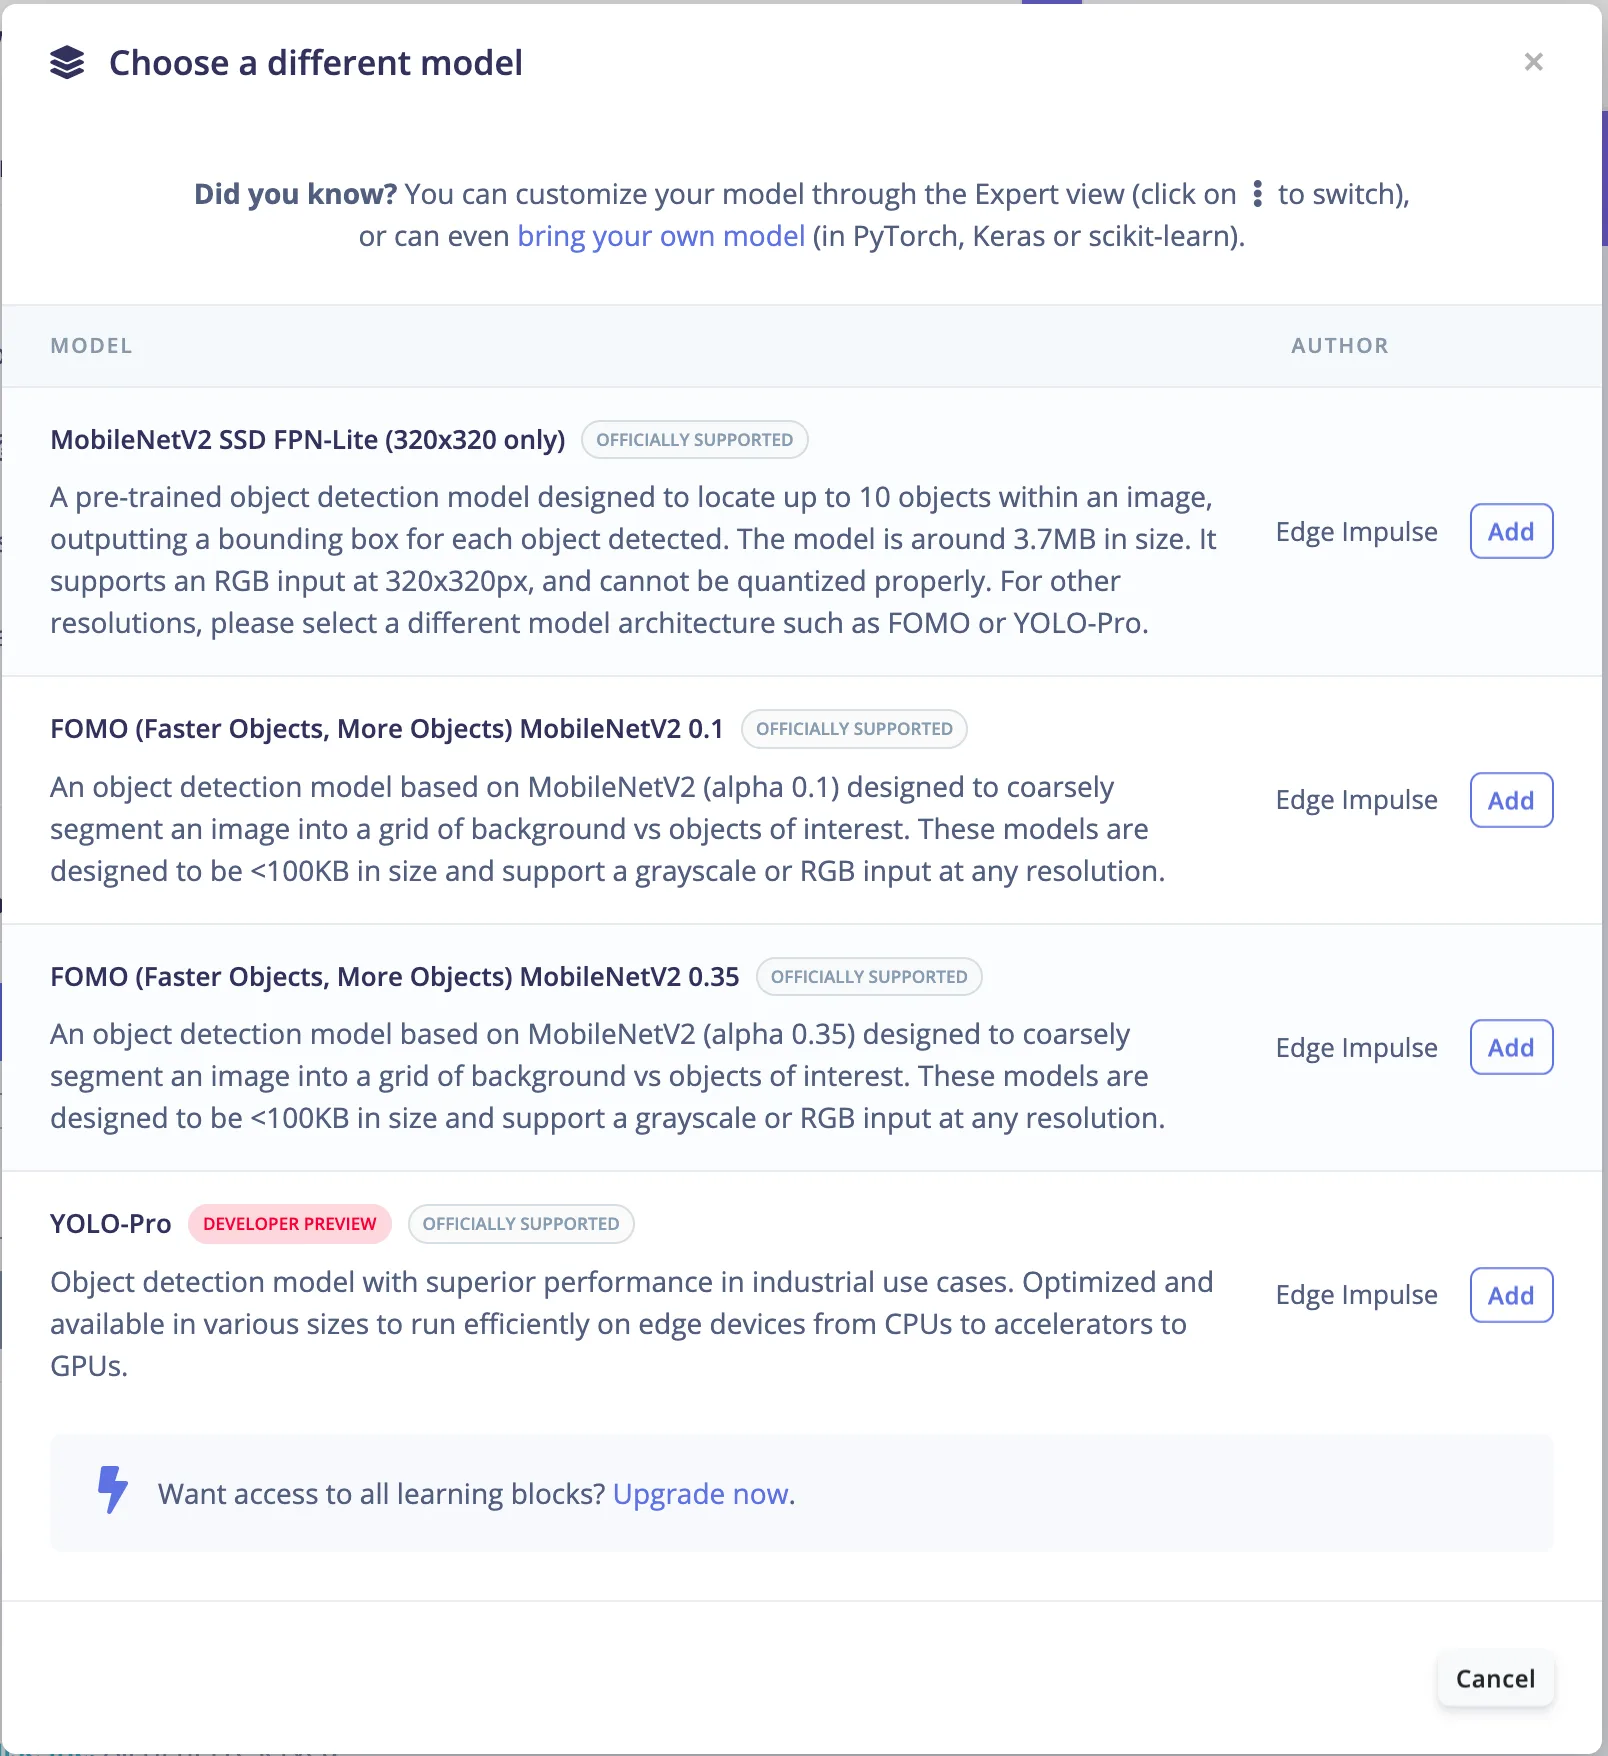
Under Object detection → Neural Network settings, click Choose a different model. A big menu pops up with your options. Pick MobileNetV2 SSD FPN-Lite (320x320 only) - it's the one that matches our 320×320 input, it's about 3.7 MB, and it's designed for exactly this "find things in a picture" task.
(FOMO and YOLO-Pro are also in the list - FOMO is tiny but coarse, YOLO-Pro is more powerful but heavier. SSD FPN-Lite is a solid middle ground.)
Step 8: Train and admire the metrics
Back on the training page, leave the defaults (25 cycles, learning rate 0.15) and hit Save & train. A few minutes later you'll get a metrics panel with mAP, precision, recall, and a bunch of variants of those at different confidence thresholds. Don't panic at the mAP number - object detection mAP is always lower than classification accuracy, and anything above ~0.5 for a two-class toy demo is perfectly fine.
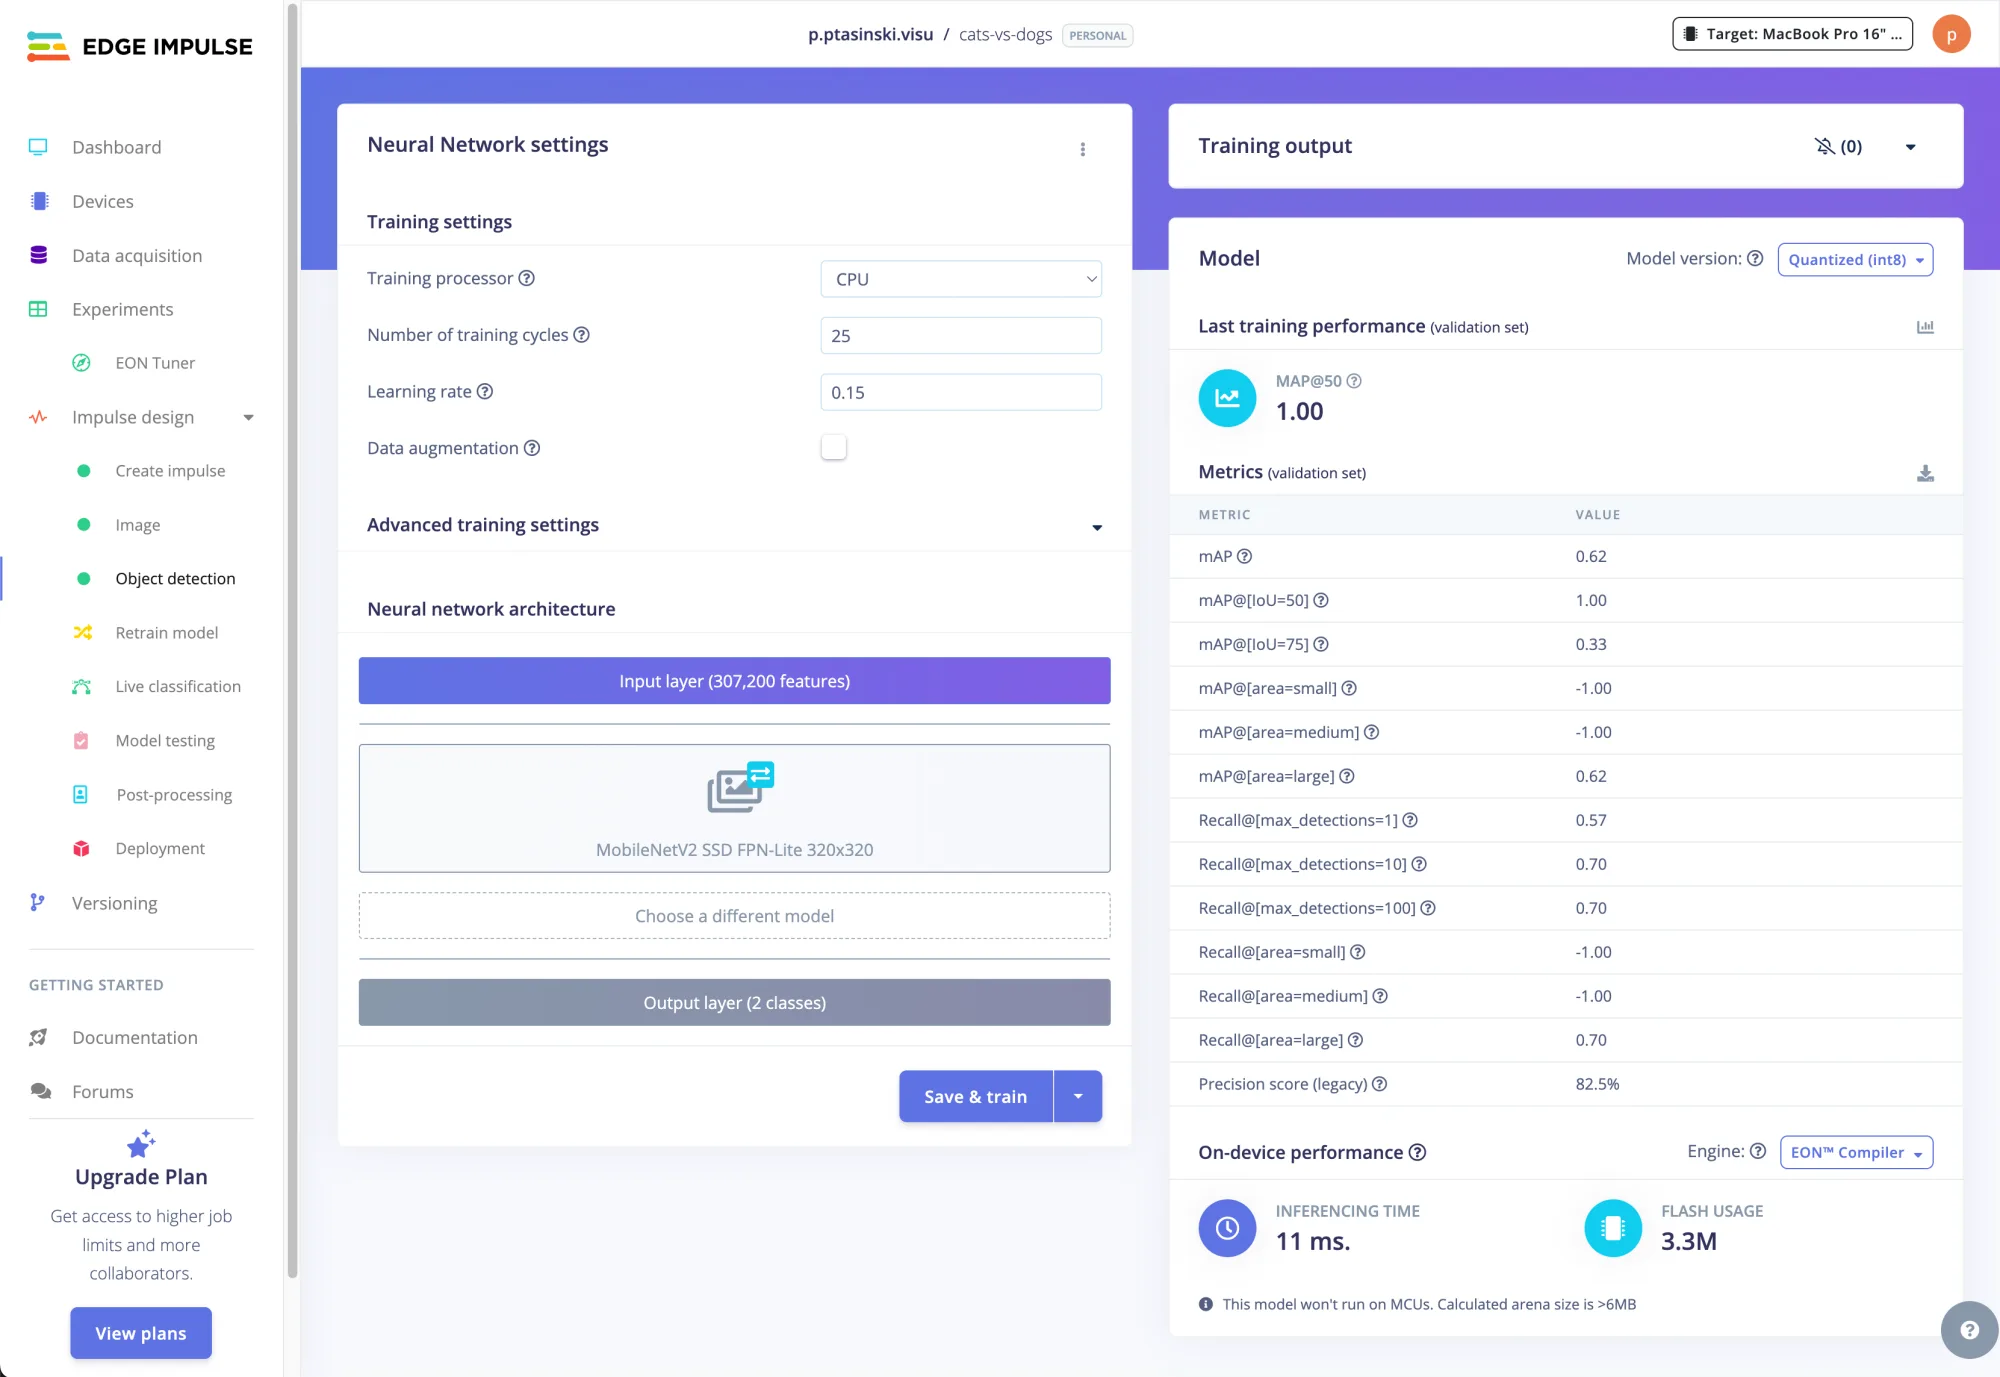
Note the inferencing time at the bottom - ~11 ms on the target device. That's our budget for real-time camera inference, and it's well under a frame.
Step 9: Deploy to WebAssembly
This is where the magic happens. Head to the Deployment tab and pick:
- Deployment target: WebAssembly (browser, SIMD)
- Model optimization: Unoptimized (float32)
Hit Build, and after a minute you get a little green checkmark and a "Built WebAssembly library" popup. Your browser will download a zip.

Unzip it and you'll find four useful files:
edge-impulse-standalone.js- the Emscripten glue codeedge-impulse-standalone.wasm- your model, compiled to WASMrun-impulse.js- a friendly classifier wrapper classindex.html- a tiny demo they throw in for free
Step 10: Actually running it in the browser
The demo they ship asks you to paste a comma-separated list of pixel features into a text box, which is... not exactly user-friendly. Let's hook it up to the actual camera.
Here's the entire thing - a single self-contained page that grabs your webcam, feeds each video frame through the model, and draws labeled bounding boxes over whatever it recognizes. Drop this as camera.html in the same folder as the files Edge Impulse gave you:
<!DOCTYPE html>
<html>
<head>
  <meta charset="utf-8">
  <title>Cat or dog?</title>
  <style>
    body { font-family: sans-serif; text-align: center; }
    #wrap { position: relative; display: inline-block; }
    video, canvas { width: 320px; height: 320px; }
    canvas#overlay { position: absolute; left: 0; top: 0; pointer-events: none; }
    #results { font-family: monospace; white-space: pre; text-align: left; }
  </style>
</head>
<body>
  <h1>Cat or dog?</h1>
  <div id="wrap">
    <video id="video" autoplay playsinline muted></video>
    <canvas id="overlay" width="320" height="320"></canvas>
  </div>
  <canvas id="frame" width="320" height="320" style="display:none"></canvas>
  <p id="results">warming up the hamsters...</p>

  <script src="edge-impulse-standalone.js"></script>
  <script src="run-impulse.js"></script>
  <script>
    const THRESHOLD = 0.6;
    const SIZE = 320;

    (async () => {
      const classifier = new EdgeImpulseClassifier();
      await classifier.init();

      const video = document.getElementById('video');
      const frame = document.getElementById('frame');
      const overlay = document.getElementById('overlay');
      const results = document.getElementById('results');
      const fctx = frame.getContext('2d', { willReadFrequently: true });
      const octx = overlay.getContext('2d');

      const stream = await navigator.mediaDevices.getUserMedia({ video: true });
      video.srcObject = stream;
      await video.play();

      const features = new Float32Array(SIZE * SIZE);

      const loop = () => {
        fctx.drawImage(video, 0, 0, SIZE, SIZE);
        const { data } = fctx.getImageData(0, 0, SIZE, SIZE);

        for (let i = 0, j = 0; i < data.length; i += 4, j++) {
          features[j] = (data[i] << 16) | (data[i + 1] << 8) | data[i + 2];
        }

        const res = classifier.classify(features);

        octx.clearRect(0, 0, SIZE, SIZE);
        octx.lineWidth = 3;
        octx.font = '16px sans-serif';

        const hits = res.results.filter(r => r.value >= THRESHOLD);
        for (const r of hits) {
          octx.strokeStyle = r.label === 'cat' ? '#e91e63' : '#2196f3';
          octx.fillStyle = octx.strokeStyle;
          octx.strokeRect(r.x, r.y, r.width, r.height);
          octx.fillText(`${r.label} ${(r.value * 100).toFixed(0)}%`, r.x + 4, r.y + 18);
        }

        results.textContent = hits.length
          ? hits.map(r => `${r.label}: ${(r.value * 100).toFixed(1)}%`).join('\n')
          : 'nothing interesting on camera';

        requestAnimationFrame(loop);
      };

      loop();
    })();
  </script>
</body>
</html>
Step 11: Serve it
Browsers won't load .wasm from file:// and they're right not to. Use the tiny Python server that ships with the Edge Impulse export:
python3 server.py
Then open http://localhost:8082/camera.html, grant camera permission, and point it at a cat. Or a dog. Or your face - the model will confidently misidentify you as both.
What's actually happening
getUserMediagives us a webcam stream- Every frame, we draw the video into a hidden 320×320 canvas
- We read back the pixels and pack each RGB triplet into a single float - this is the format Edge Impulse's WASM expects (one float per pixel, R in the high byte, then G, then B)
- We hand the float array to
classifier.classify(), which runs the SSD model inside the WebAssembly module - We draw the resulting bounding boxes back onto an overlay canvas sitting right on top of the video
The whole round-trip is maybe 30-60 ms per frame on a modern laptop, and not a single pixel ever leaves your machine. Your cat's dignity remains fully intact.
Things I learned
- SIMD matters. The non-SIMD build is noticeably slower. Pick the SIMD target unless you need to support an ancient browser.
- Float32 is fine for a demo. You could use quantized int8 for smaller/faster inference, but "unoptimized" is the easiest path to "it just works", and the model is already tiny.
- YOLOv5 labeling is shockingly good. It's not perfect - it occasionally labels a couch cushion as a cat, which honestly, fair - but it turns a week of labeling into an afternoon of verification.
- The browser is a wildly capable ML runtime now. Five years ago this demo would have required a GPU server, a REST API, and probably a Kubernetes cluster. Now it's four files and an HTML page.
Go forth and classify pets.