Are you interested in writing your own Chrome extension, but think it’s too hard? If so, then I’ve been in your place, and I can tell you now that there's nothing to worry about. I will share my story and the approach that I took while creating my first Chrome extension.
I had a problem that I needed to solve: I’ve been doing my home budget bookkeeping in a Google spreadsheet. At the end of each month, I would sit down and write up all my earnings and expenses, divided by categories that I had come up with. Over the years, this process has become tiring and time-consuming, so I’ve come up with a plan to create a Chrome extension that would scrape data from my banking account and fill all the recurring spendings with the correct category and description.
I was worried that writing such an extension would require me to learn many new concepts. Thankfully, all you need is just a basic understanding of web development technologies such as HTML, CSS, and JavaScript.
The first thing that I needed to create was a manifest file. This file contains all the information that the browser needs to properly set up your extension. It is similar in some ways to an Android app manifest. It needs to be named manifest.json and be in the root directory of your code. A really basic manifest file from my project looks like this:
{
    "name": "Expenses Scraper Extension",
    "description": "Scrap mBank data to CSV",
    "version": "0.0.1",
    "manifest_version": 3,
    "permissions": ["storage", "activeTab", "scripting"],
    "action": {
        "default_popup": "popup.html"
    }
}
The name, description, and version attributes are self-explanatory. At the moment, the latest version of the Chrome manifest is 3, so I’ve used that. The three permissions that I’ve needed are storage (for storing my rule set in Chrome’s memory), activeTab (for targeting the open chrome tab), and scripting (for executing a JS script inside the targeted tab).
The action attribute describes what happens when you click on your extension icon in Chrome’s topbar. In my case, it just renders the "popup.html" file.
There are many more features available through the manifest file, like service worker configuration, an extension options menu, or icons. You can also narrow down an extension’s action to a specific site or domain.
If you have your manifest ready, you can load it into Chrome. To do that, go to chrome://extensions/, switch to Developer Mode, and click Load Unzipped.
Aside from the manifest file, writing a Chrome extension is really similar to writing any web page or application. You use the same techniques for HTML, JS, and CSS as you would in web development. You can use libraries that you like, and the popup.html window that gets opened when you click the icon behaves the same way as any page opened in a new tab.
However, Chrome extensions have some additional powers: they can interact with any other open tab and inject code into it. You do this by using chrome.tabs and chrome.scripting APIs. In my project, I only needed access to my bank account page, so I could scrape the data that I was looking for. To do this, first I used a tab reference:
let [tab] = await chrome.tabs.query({ active: true, currentWindow: true });
This line of code lets you access the currently open tab.
Next, I had to execute my scrapping code on this tab:
return chrome.scripting.executeScript({
    target: { tabId: tab.id },
    func: scrapData,
    args: [className]
}).then((res) => {
    return res[0].result;
});
This code runs the scrapData function in the open tab. One important thing is that the ScrapData function gets executed inside this tab’s context, so assigning any values through this won’t work. Also, if you want to use any variables "outside" of the tab, you need to declare them in the "args" attribute. In my case, I wanted to pass the class name of the element that will be checked on the bank page. I think that this class can change when my bank updates its app, so I want to be able to also change it in my extension’s UI.
The other place where writing extensions differs a little from writing web pages is data persistence. When writing Chrome extensions, you should use the chrome.storage API. Here you have access to storage.local and storage.session objects, which behave the same way as localStorage and sessionStorage in web development. One additional feature is the storage.sync object. It lets you sync the data to any Chrome browser that the user is logged into. If the user has syncing disabled, it behaves like storage.local.
You can access and save your data like this:
async function loadRules() {
    return chrome.storage.sync.get("ruleSet");
}

function saveRules(ruleSet) {
    chrome.storage.sync.set({ ruleSet });
}
One thing worth noting is that the chrome.sync.get function is async, so it needs to be handled accordingly.
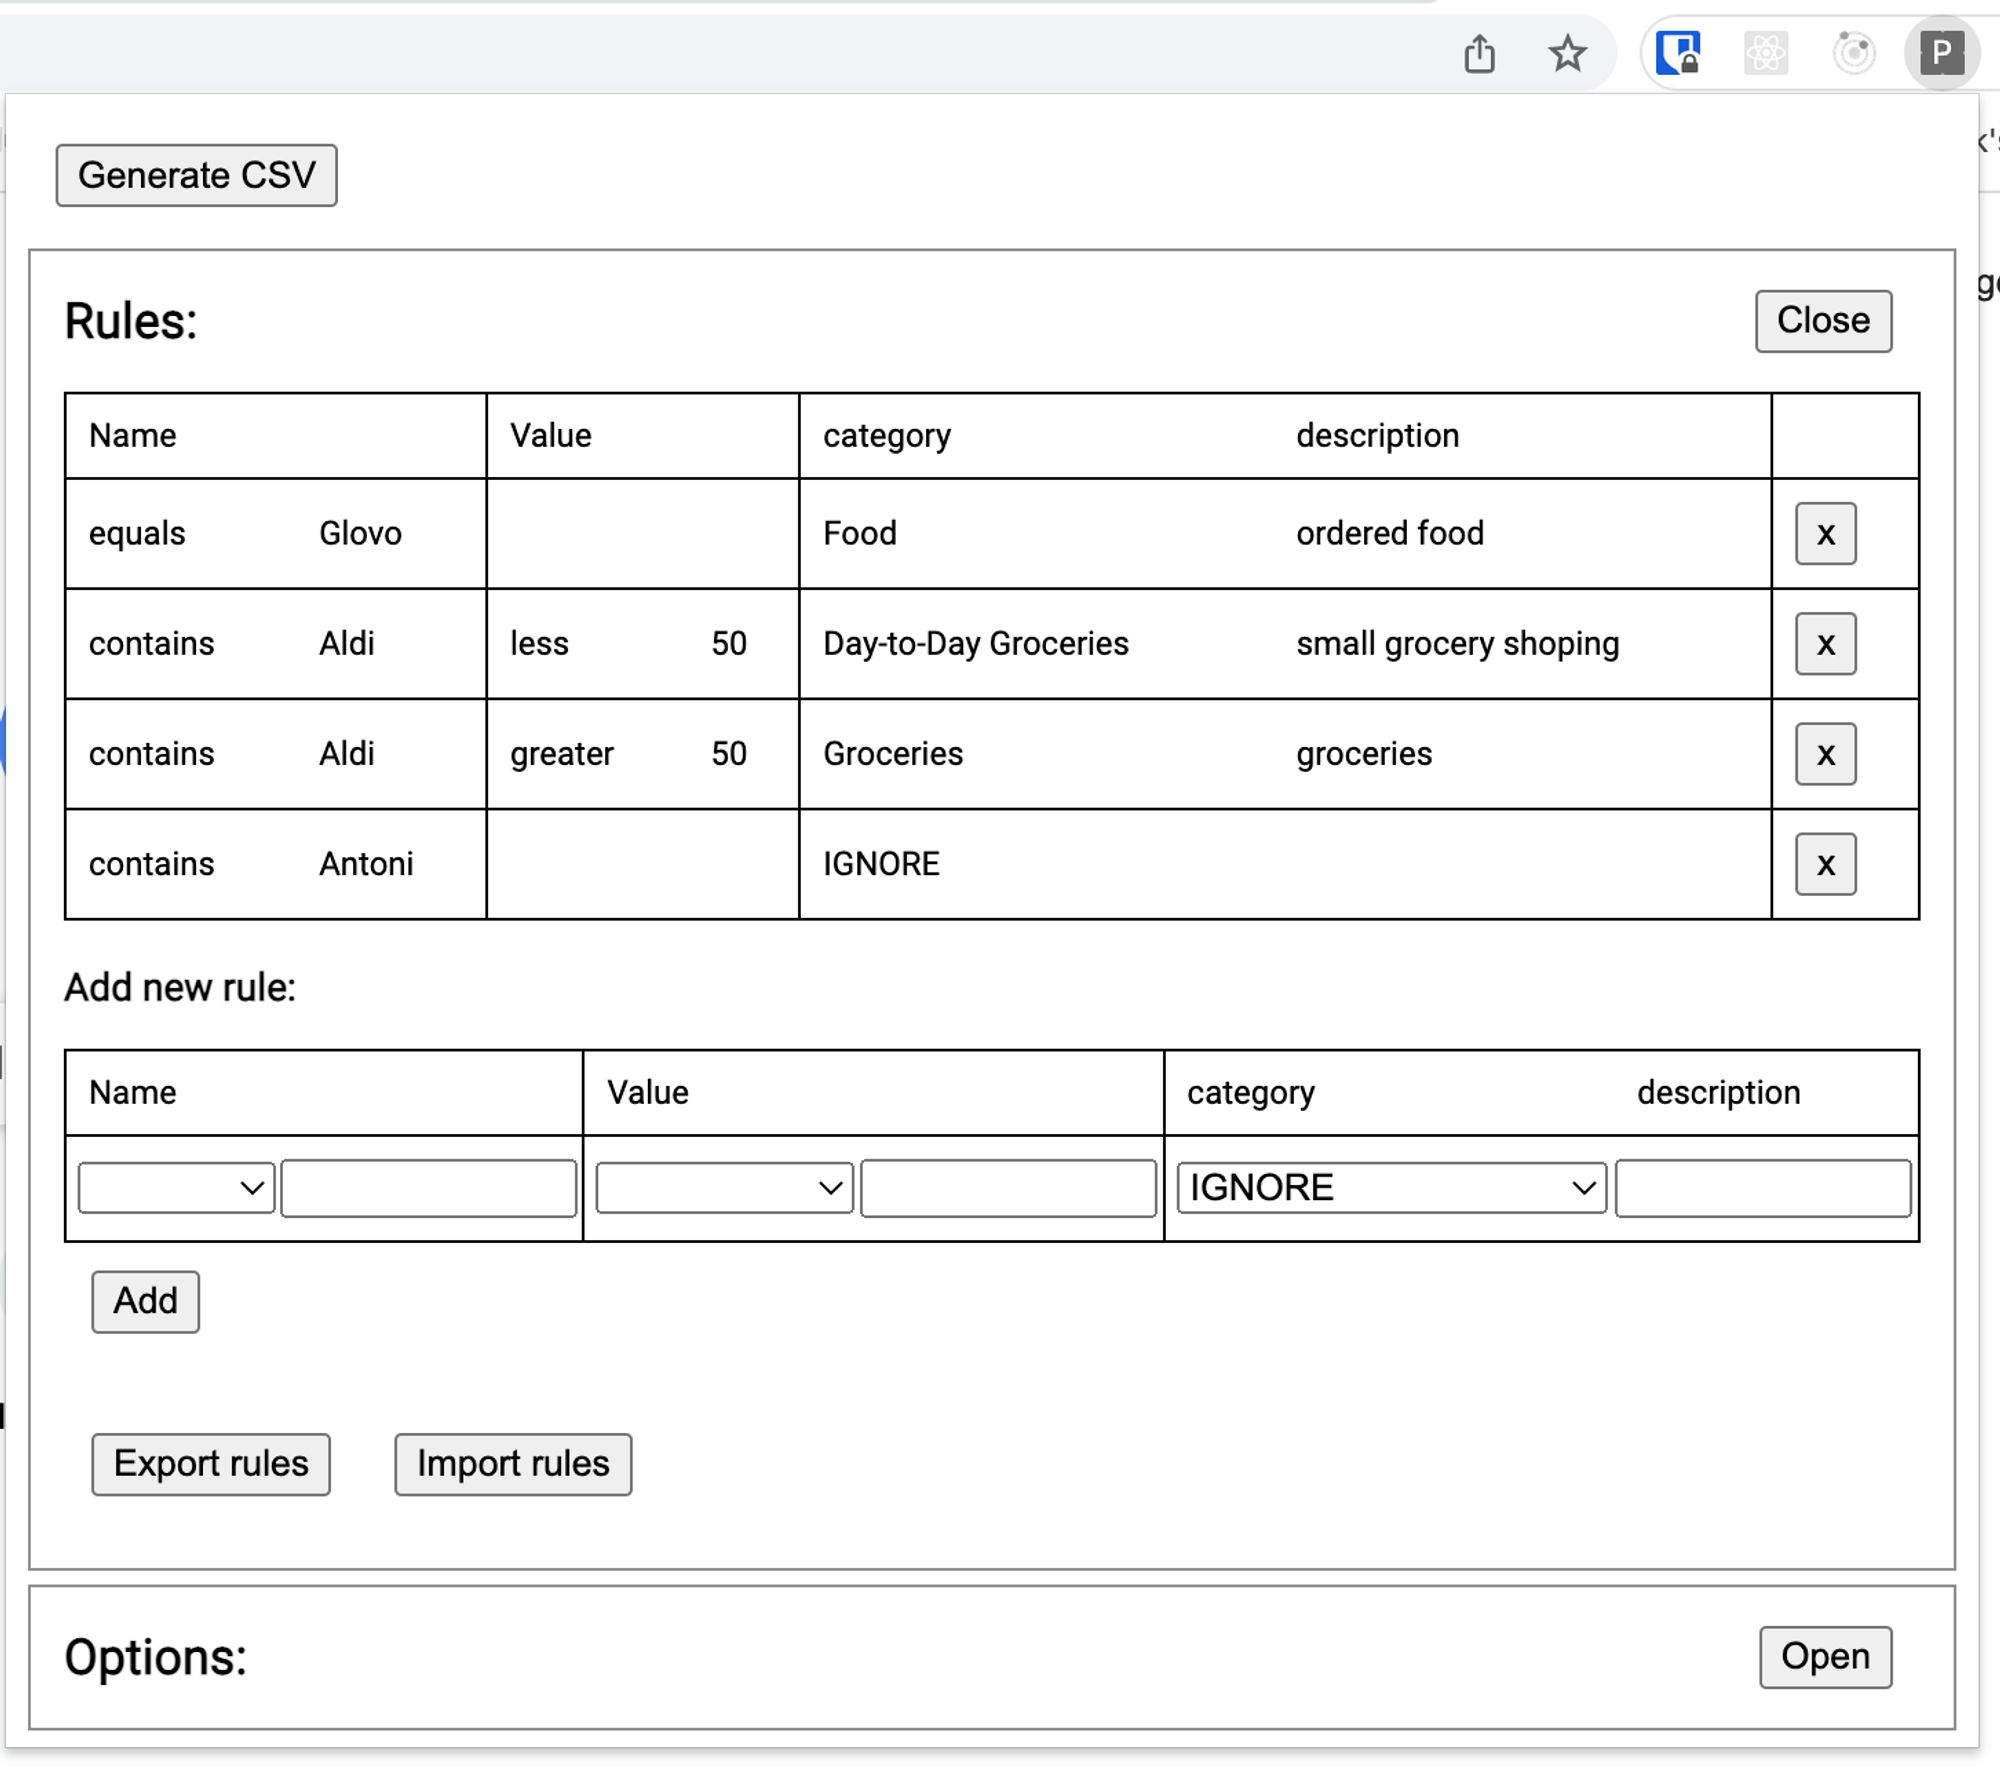
Overall, the process of writing my Chrome extension was more fun and easier than I anticipated. The finished product allows me to add and remove rules that describe what category and description should be assigned to each expenditure based on its value and name in my banking history.Then, based on those rules, I can generate CSV data that is fully compatible with my spreadsheet. This tool does not look flashy, but it gets the job done.
If you would like to go through the code, it is available here. And if you’re an mBank customer and would find my script helpful, feel free to pull the code and use it yourself.
This post is not a tutorial. Chrome extensions can do much more than what I described here. If you want a more in-depth look at the features that I touched upon here, Google has well-written documentation.
So if you've been wanting to try your hand at creating your own Chrome extension, I hope I've convinced you to do it.


